Sew stylish women's wide-leg pants: complete sewing guide
PATTERN DESCRIPTION
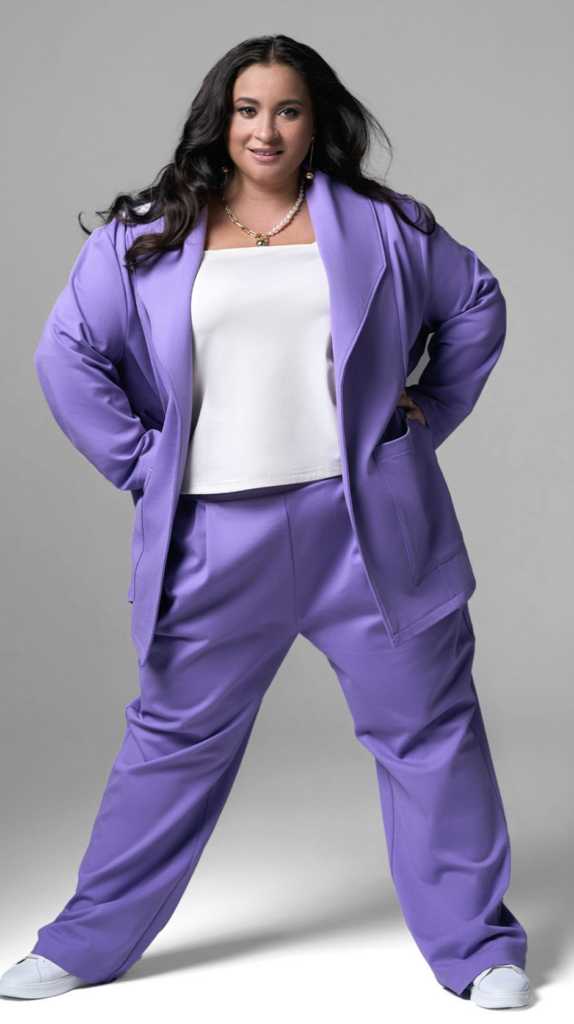
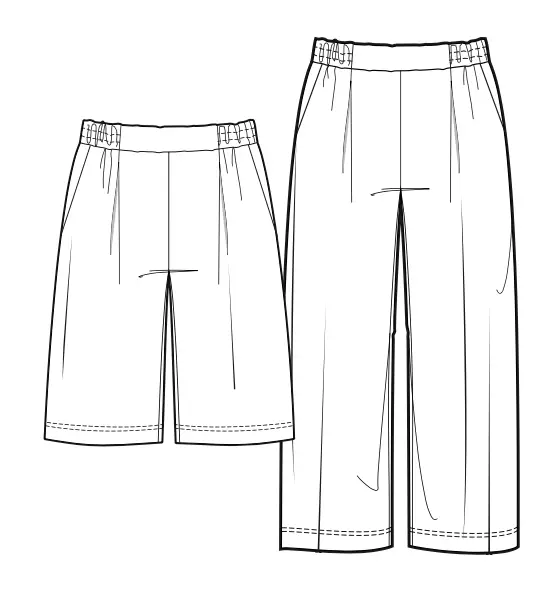
Tokyo is a pair of semi-fitted straight-cut pants. The front features side pockets and an elasticated waistband. You can also use the pattern to make shorts. Side seams and inseams have extra notches for knee-length shorts.
SUGGESTED MATERIALS
We recommend to use medium weight knitted fabrics such as jersey, French terry or lighter weight sweatshirting.
ALSO NEEDED
• Interfacing 10 cm (3,94”);
• Elastic 3,5—4 cm (1,38—1,57 in) wide, for different sizes:
| Size | 50 | 52 | 54 | 56 | 58 | 60 | 62 | 64 |
|---|---|---|---|---|---|---|---|---|
| cm | 82 | 83 | 84 | 85 | 86 | 87 | 88 | 89 |
| in | 32,3 | 32,7 | 33,1 | 33,5 | 33,8 | 34,2 | 34,6 | 35 |
FABRIC REQUIREMENT (CM/IN)
for fabric width 1.50 m (59,1 in)
|
International Size \ European size |
50-52 | 54-56 | 58-60 | 62-64 |
|---|---|---|---|---|
| Main fabric for pants, m | 2,35 | 2,40 | 2,45 | 2,45 |
| Main fabric for pants, in | 92,5 | 94,5 | 96,5 | 96,5 |
| Main fabric for shorts, m | 1,60 | 1,70 | 1,80 | 1,85 |
| Main fabric for shorts, in | 63,0 | 66,9 | 70,9 | 72,8 |
The fabric use does not include possible shrinkage. Please account for shrinkage and buy 5—10% more than required.
SEAM ALLOWANCES
Pattern pieces already include 0,7 cm (0,27”) seam allowances for all edges. Please adjust the pants length according to your height. If you are higher than 170 cm (66,9”) or prefer wearing high heels, it is recommended to add few centimeters to the hem and then adjust the length during the fitting.
SPECIFICATIONS
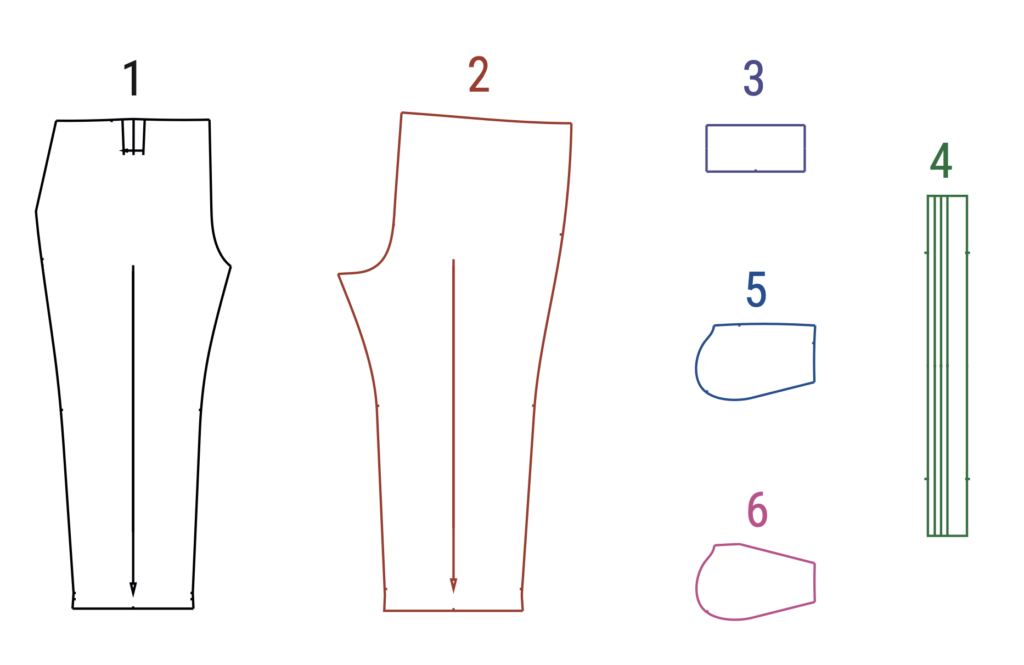
(№ – Name – Pieces’ quantity)
Main fabric:
1 – Front leg – 2
2 – Back leg – 2
3 – Front waistband – 1 + interfacing
4 – Back waistband – 1
5 – Pocket bottom bag – 2
6 – Pocket top bag – 2
PATTERN PIECES
LAYOUT OF PARTS ON FABRIC
Main fabric (pants)
Width of fabric — 1.50 m (59,1 in)
Size — 50
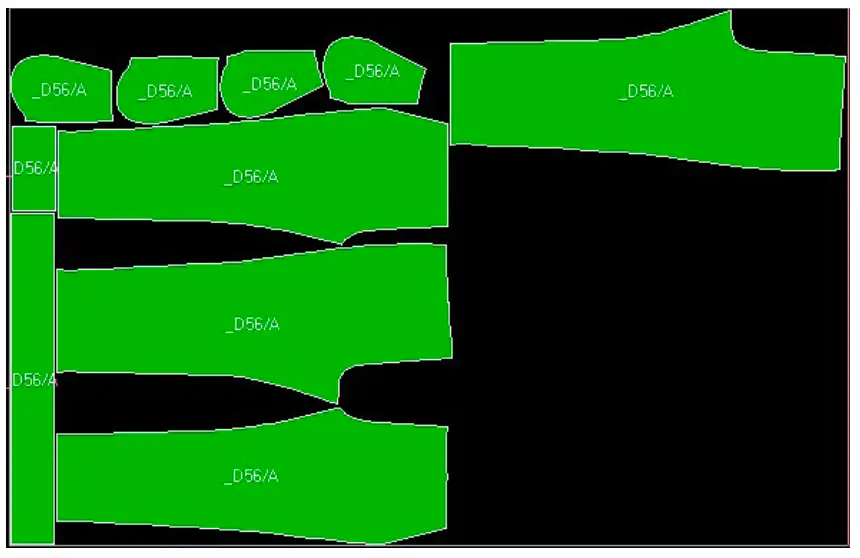
Size — 64
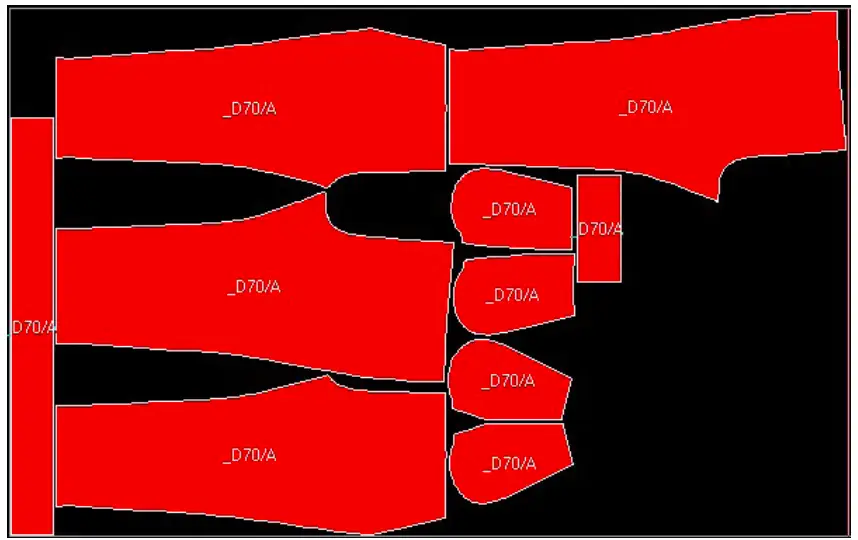
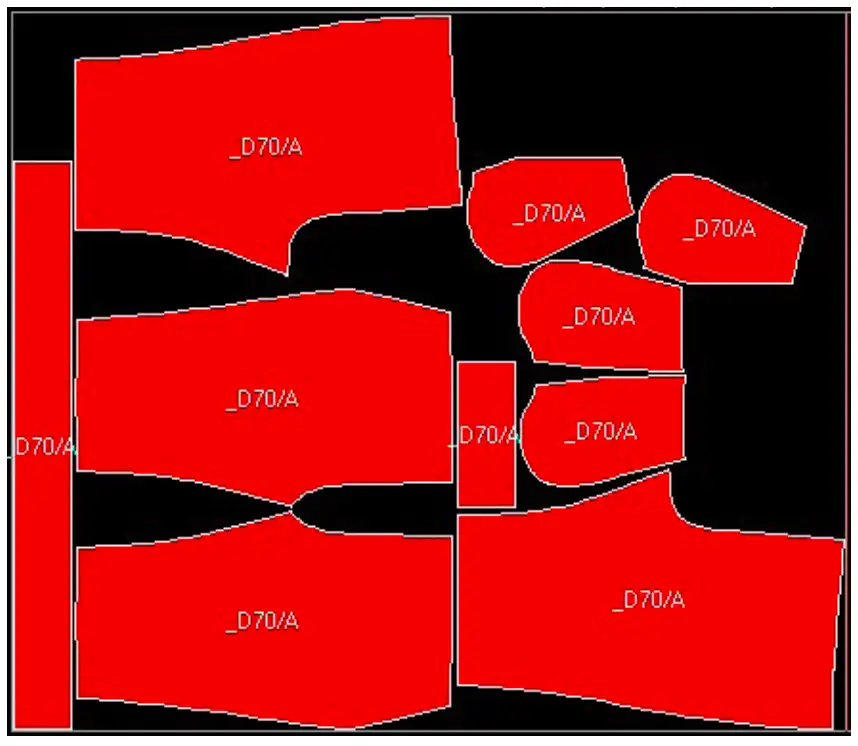
Main fabric (shorts)
Width of fabric — 1.50 m (59,1 in)
Size — 50
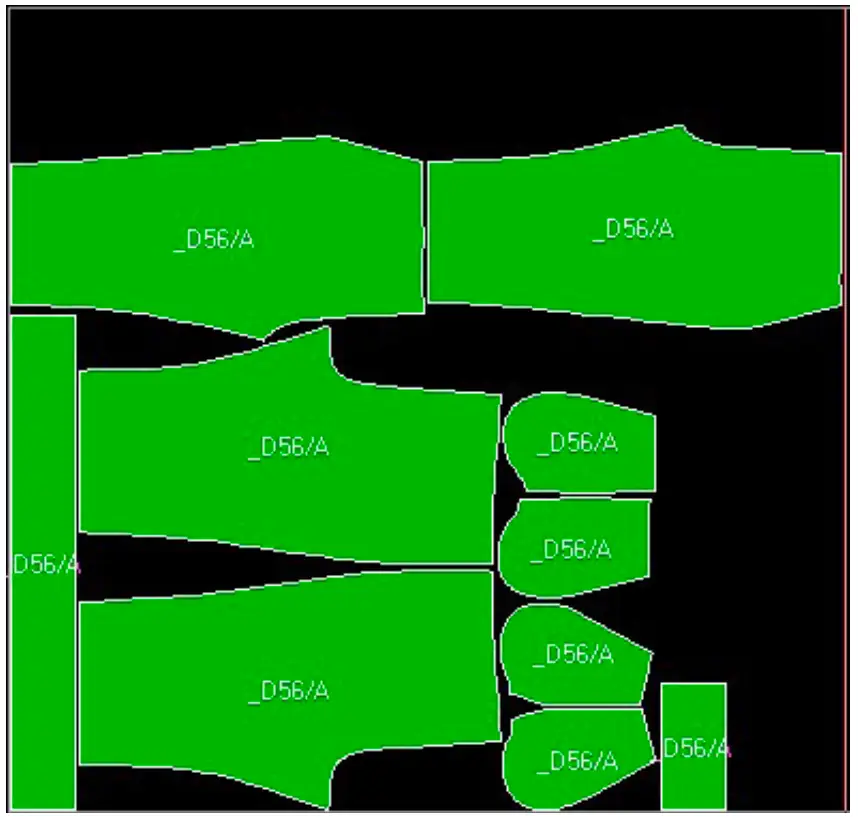
Size — 64
INTERFACING
Front waistband (3).
SEWING INSTRUCTIONS
POCKETS
1. Interface the pocket opening area of the pocket top bag (6) with 1 cm (0,39”) wide fusible tape.
2. Pin the pocket top bag (6) and the front leg (1) right sides together and stitch on the sewing machine. Topstitch the seam allowance to the pocket bag stitching 0,2 cm (0,08”) away from the original seam. Press the pocket bag towards the front leg side.
3. Pin and stitch the pocket bottom bag (5) on the overlocker. Press the seam. Stitch the pocket to the waist and the side edge to secure its position.
4. Make a pleat by matching the notches in the waist.
PUTTING THE GARMENT TOGETHER
1. Place the front (1) and the back (2) leg right sides together, pin and stitch side seams on the overlocker. Press seam allowances towards the back.
2. Pin and stitch inseams on the overlocker. Press seam allowances towards the back.
3. Slide one leg into the other right sides together, pin and sew the crotch seam on the overlocker. Press.
WAISTBAND
1. Fold waistband pieces (3, 4) in half and press.
2. Pin and sew waistband pieces together. Press the seam allowances open.
3. Stitch the elastic to the waistband’s side seams.
4. Sew the elastic to the waistband’s long side stitching 0,5 cm (0,2”) away from the edge, aligning notches.
5. Distribute the elastic inside the waistband as evenly as possible, pin and topstitch 1,7 cm away from the fold line. Then make the second line of stitching 3—4 cm (1,2—1,6”) away from the fold line. Press.
6. Place the waistband and the pants right sides together aligning the notches. Pin and sew on the overlocker. Press the seam allowance towards the pants.
7. Turn the hem allowance up and press.
8. Stitch the hem allowance using a double needle or finish it on the overlocker and then stitch using a regular needle.
9. Give the garment a final press.
