

The midi skirt features a stitched waistband, widened towards the bottom, consisting of twelve panels. It fastens with an invisible zipper in the side seam, two buttonholes and two buttons on the waistband. The panels are finished with an edging made of contrasting material.
We recommend using linen, cotton, denim and suit fabrics.
• Fabric for edging tape — 0.60 m (⅝ yd);
• Invisible zipper — 20 cm (7 ⅞”);
• Button — 2 pcs.;
• Interfacing tape — 50 cm (19 ⅝”);
• Interfacing — 20 cm (7 ⅞”).
|
International Size \ European size |
XXS-XS / 34-36 |
S-M / 38-40 |
L-XL / 42-44 |
2XL-3XL / 46-48 |
|---|---|---|---|---|
| Main fabric, m | 1,30 | 1,45 | 1,55 | 1,70 |
| Main fabric, yd | 1 ⅜ | 1 ⅝ | 1 ¾ | 1 ⅞ |
When purchasing fabric, please account for shrinkage and buy 5—10% more than required.
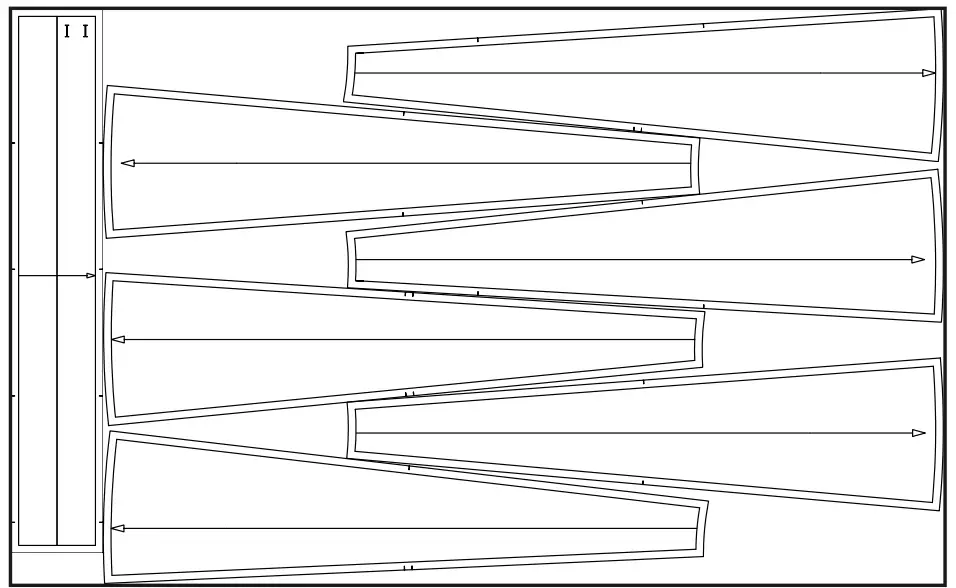
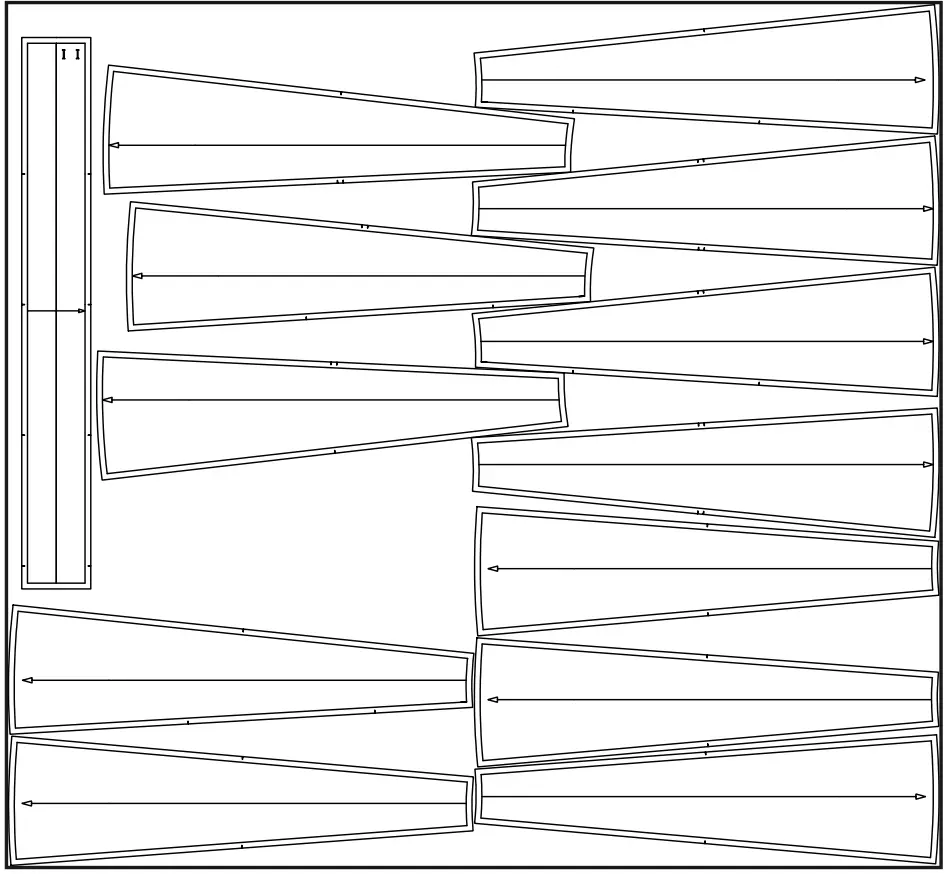
Pattern pieces already include seam allowances.
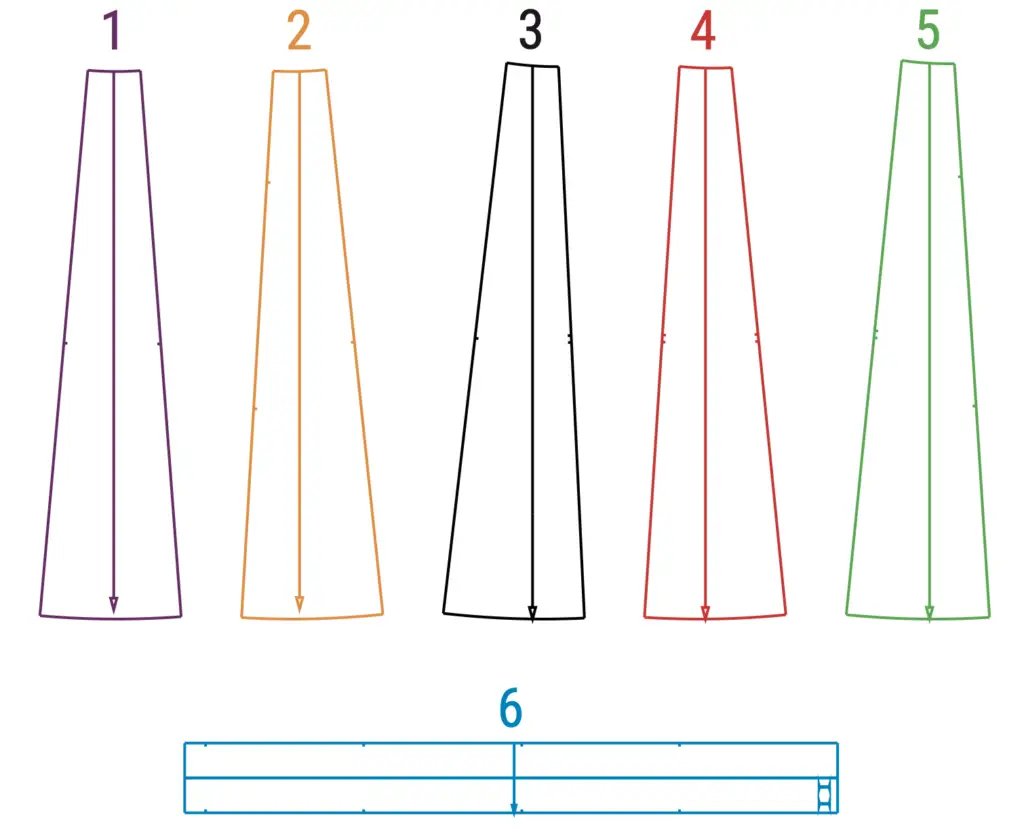
(№ – Name – Pieces’ quantity)
Main fabric:
1 – Main front panel – 4
2 – Side front panel- 2
3 – Main back panel – 2
4 – Middle back panel – 2
5 – Side back panel – 2
6 – Waistband – 1 + Interfacing
• Waist ease — 2 cm (3/4″);
• Hips ease — 15 cm (5 ⅞”).
Waistband (6).
Interface the allowances under the zipper: side front panel (2), side back panel (5).
Width of fabric — 1.50 m (1 ⅝ yd)
Size — 34 (XXS)
Size — 48 (XXXL)
1. You can use ready-made edging tape or make it yourself. Mark lines on the fabric at an angle of 45 degrees and a width of 3 cm (1 ⅛”). The length of the edging corresponds to the cut length of the pieces.
2. To make it easier to sew the edging, you can optionally stitch it into one long strip.
3. Stitch the edging allowances at 0.5 cm (3/16’’) from the edge and press them.
4. Press the edging in half along the longitudinal section.
FRONT SKIRT
1. Stitch the edging at 0.5 cm (3/16″) from the edge on the left edge of the main front
panels (1) and on one side panel of the front skirt (2).
2. Sew all the panels of the front skirt, overlock and press the allowances to the center.
BACK SKIRT
1. Stitch the edging at 0.5 cm (3/16″) from the edge of the main back panel (3), middle back panels (4) and on one side back panel (5).
2. Sew all the back panels, overlock and press the allowances to the center.
ZIPPER
1. Overlock the side edges of the skirt and stitch. Press the allowances, leaving the zipper edges unstitched.
2. Place one side of the zipper right side down and stitch stepping 1 cm (3/8″) from the top edge of the skirt. Sew the second side of the zipper in the same way.
3. Pin the bottom edge of the zipper to the side seam allowance. Press.
WAISTBAND
1. Overlock the lower longitudinal side of the waistband (6).
2. Press the waistband lengthwise, inside out.
3. Place the waistband and the top section of the skirt right sides together. Sew and press seam allowances to the waistband.
4. Stitch the short side of the waistband, cut out the corners and turn it onto the right side.
5. Stitch the waistband short edge, cut out the corners and turn it onto the right side. Press.
6. Pin the hemmed edge of the waistband to the seam where the waistband is attached to the skirt and stitch into this seam on the right side. Press.
7. Mark the location of the buttonholes and make them.
8. Sew buttons.
9. Give the skirt a final press.