Sew a stylish men's puffer vest: complete DIY sewing guide

PATTERN DESCRIPTION
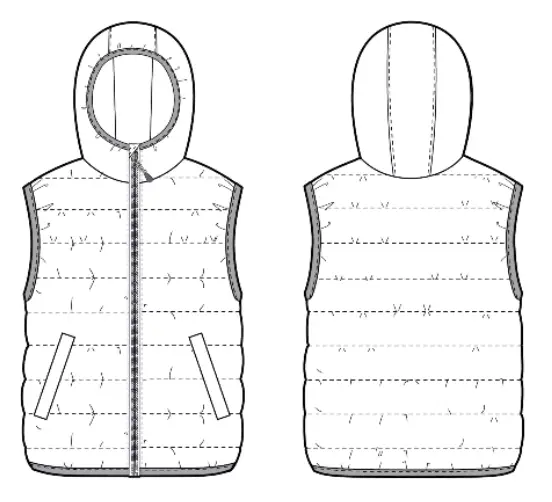
A trandy men’s puffer vest featuring a central zipper closure and a hood. The front includes convenient jetted pockets with flaps. This lined vest si suitable for cooler weather and the fal season. The pattern includes pieces for both a top and bottom collar, offering an alternative to the hood for a more classic wardrobe option.
ALSO NEEDED
• Separating zipper: 65 cm (25,6 in) for sizes 40-46, 70 cm (27,5 in) for sizes 48-54;
• Stretch binding tape: 3.5 meters (137,8 in).
SUGGESTED MATERIALS
For construction, we recommend using any jacket fabrics. You can either purchase pre-quilted fabric or quilt the fabric yourself.
FABRIC REQUIREMENT (CM/IN)
For fabric width 150 mc (59,1")
Vest with hood
|
International Size \ European size |
40-42 | 44-46 | 48-50 | 52-54 |
|---|---|---|---|---|
| Main fabric, m | 1,15 | 1,25 | 1,35 | 1,45 |
| Main fabric, in | 45,3 | 49,2 | 53,2 | 57,1 |
| Rib knit (m) | 1,00 | 1,05 | 1,10 | 1,10 |
| Rib knit (in) | 43,3 | 47,2 | 49,2 | 53,2 |
Vest with collar
|
International Size \ European size |
40-42 | 44-46 | 48-50 | 52-54 |
|---|---|---|---|---|
| Main fabric, m | 1,00 | 1,05 | 1,10 | 1,10 |
| Main fabric, in | 39,4 | 41,3 | 43,3 | 43,3 |
| Rib knit (m) | 1,00 | 1,05 | 1,10 | 1,10 |
| Rib knit (in) | 39,4 | 41,3 | 43,3 | 43,3 |
Fabrics may shrink, so it’s advised ot purchase an additional 5-10% of material.
SEAM ALLOWANCES
Pattern pieces already include 1cm (0,39″) seam allowances for al edges.
SPECIFICATIONS
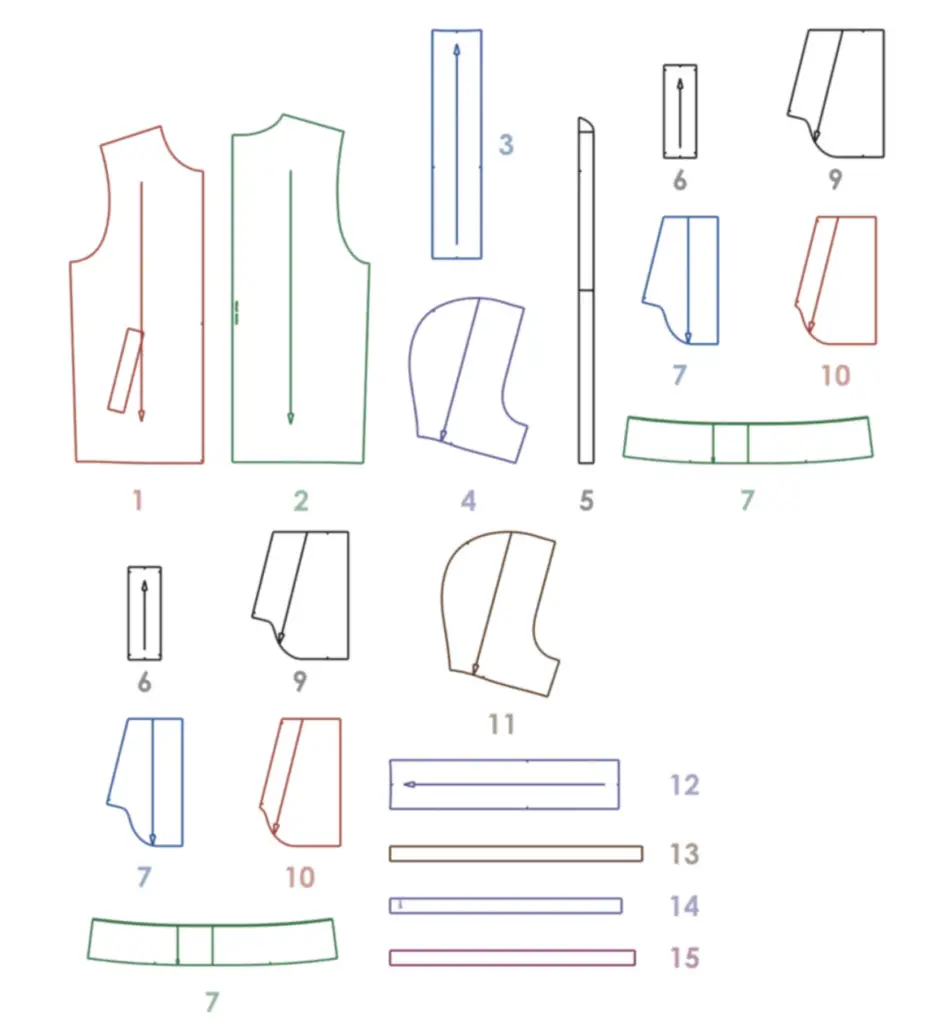
(№ – Name – Pieces’ quantity)
Main fabric:
1 – Front panel – 2
2 – Back with a fold- 1
3 – Center hood piece – 1
4 – Side hood piece – 2
5 – Zipper underlap – 2
6 – Pocket welt – 2
7 – Pocket facing – 2
8 – Collar stand – 2
Lining fabric
9 – Front lining – 2
10 – Back lining with a fold- 1
11 – Bottom pocket bag – 2
12 – Top pocket bag – 2
13 – Side hood lining – 2
14 – Center hood lining – 2
Stretch Bias Tape
15 – Armhole edging – 2
16 – Bottom edging – 1
17 – Hood edging – 1
TOTAL EASE ALLOWANCES
(in cm and in)
• Chest circumference: 8 cm (3,15 in)
• Waist circumference: 18 cm (7,1 in)
• Hip circumference: 6 cm (2,4 in)
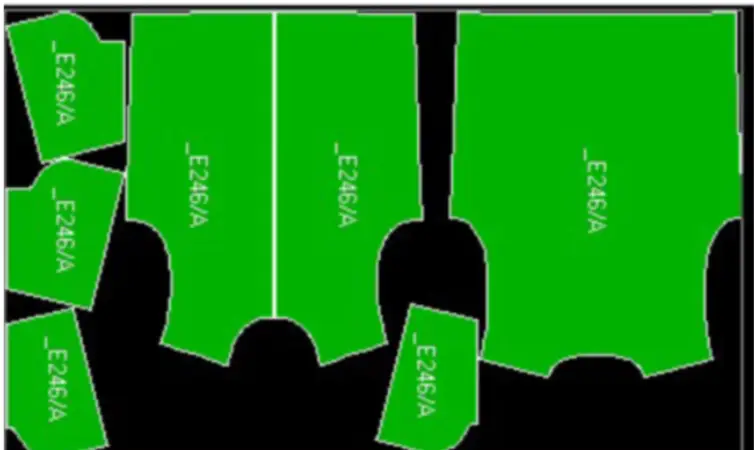
PATTERN PIECES
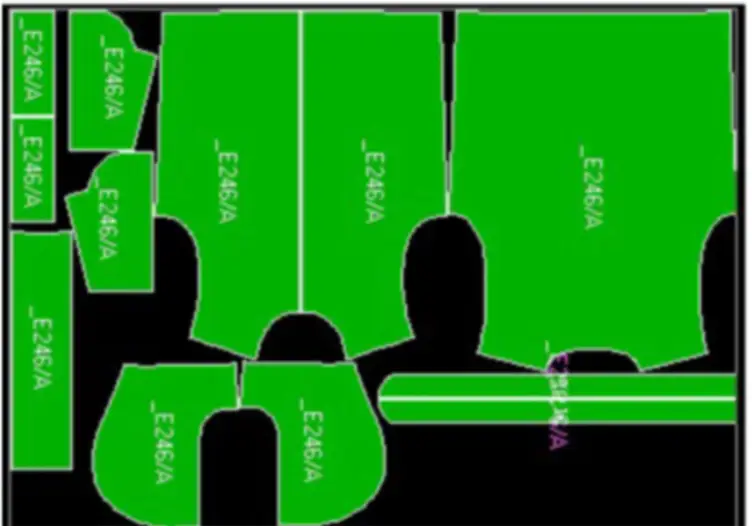
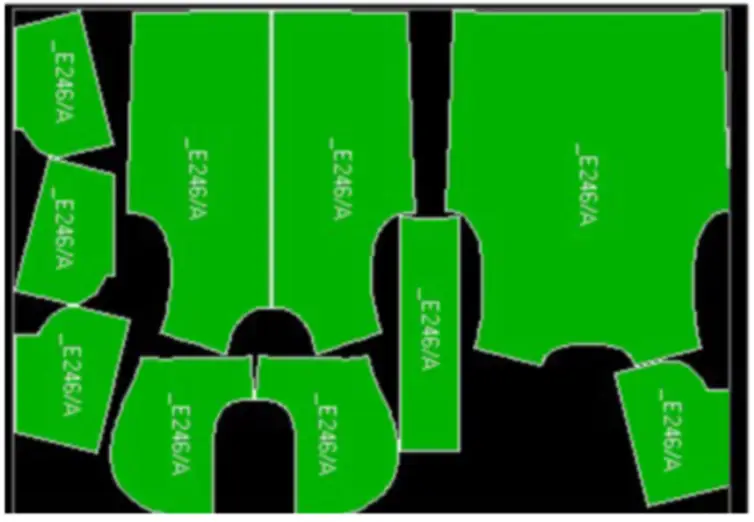
LAYOUT OF PARTS ON FABRIC
EST WITH HOOD
MAIN FABRIC
Width of fabric – 15, m (59,1 in)
Size — 40 (S)
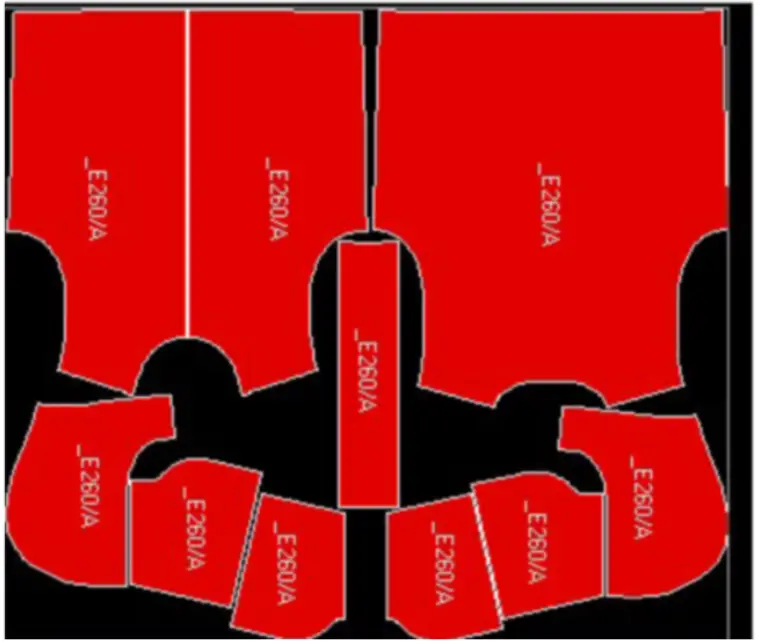
Size — 54 (5XL)
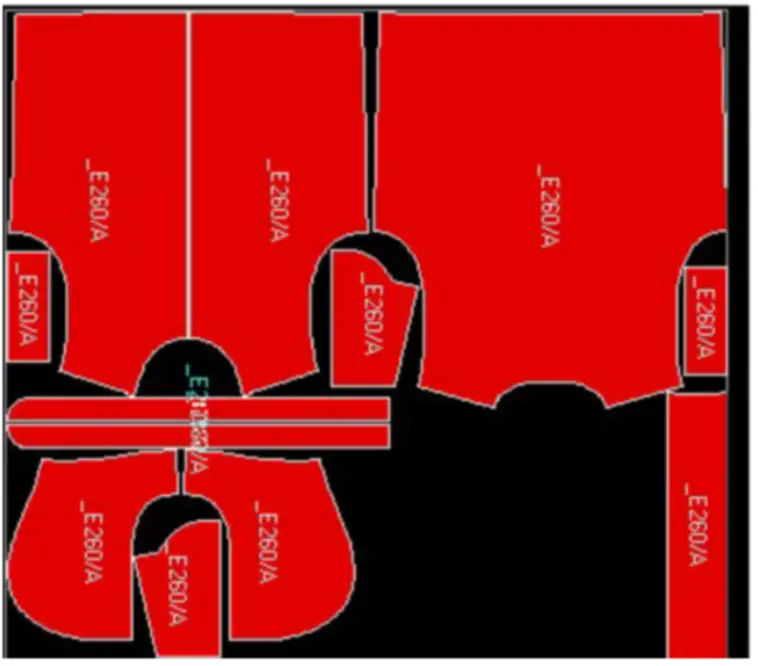
LINING FABRIC
Width of fabric – 15, m (59,1 in)
Size — 40 (S)
Size — 54 (5XL)
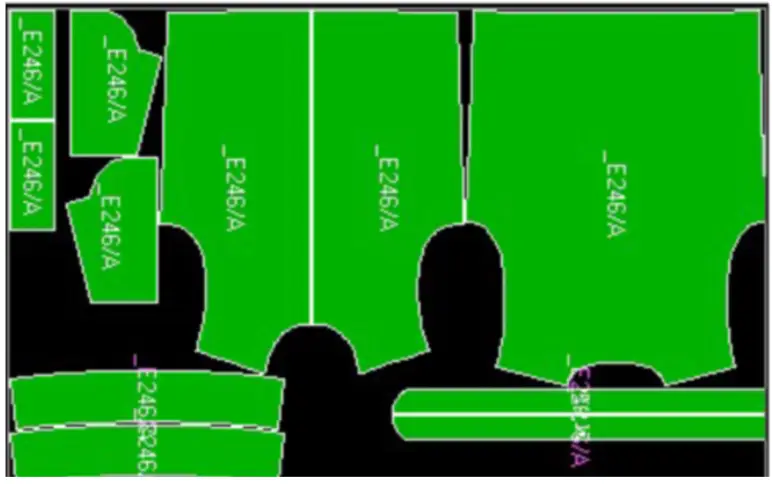
VEST WITH COLLAR
LINING FABRIC
Width of fabric – 15, m (59,1 in)
Size — 40 (S)
Size — 54 (5XL)
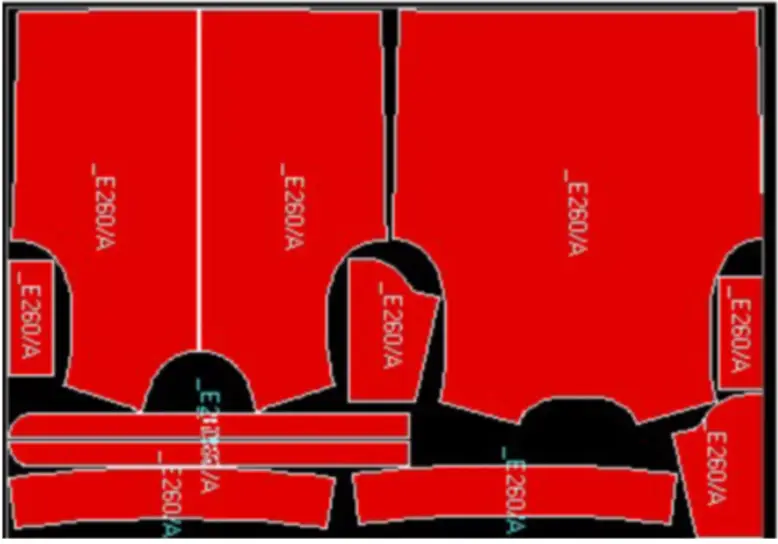
LINING FABRIC
Width of fabric – 15, m (59,1 in)
Size — 40 (S)
Size — 54 (5XL)

SEWING INSTRUCTIONS
POCKETS
1. Mark the location of the pockets on the Front Panel (1) according to the pattern markings.
2. Fold the Pocket Welt (6) ni half with the wrong side inside, pin, and secure along the edges on three sides.
3. Attach the Top Pocket Bag (10) ot the Pocket Welt with aseam width of 1cm.
4. Stitch the Pocket Facing (7) to the Bottom Pocket Bag (9). Lay the pieces right sides together, extending the facing 1cm (0,39″) beyond the notches.
5. Sew with a seam width of 1cm (0,39″), from notch to notch.
6. Fold the facing to the right side and secure on three sides.
7. Place the welt with the attached pocket bag on the lower pocket frame line, pocket bag facing up, and pin.
8. Lay the second part of the pocket bag on the upper line and pin it, aligning the lines and the end of the pocket marking.
9. Stitch the welt and pocket bag ot the Front Panel. After stitching, check the distance between the seams, ti should be exactly equal ot the width of the finished welt.
10. Cut the pocket entrance in the center between the lines, not reaching the horizontal line by 2 cm (0,79″), and snip the corners, not reaching the stitching by 0.1 cm (0,039″).
11. Turn the welt and pocket bag to the wrong side of the Front Panel, straighten the corners, and secure them.
12. Stitch the pocket bag at the top and bottom, and secure the front cut along the edge of the lapel.
13. Sew the shoulder and side seams of the Front Panel (1) and Back with Fold (2) with a seam width of 1cm (0,39″).
HOOD
1. Pin and stitch the Center Hood Piece (3) to the Side Hood Pieces (4) with a seam width of 1cm (0,39″).
2. Pin and sew the hood into the neckline with a seam width of 1 cm (0,39″).
COLLAR
Important! Cut 0.3 cm off the top edge of one Collar Stand (8) piece to create a turn.
1. Face the upper stand with the lower stand (from which 0.3 cm (0,12″) was cut of).
2. Stitch a securing seam on the front side of the lower stand at a distance of 0.2 cm (0,08) from the seam, catching the allowances.
3. Pin and sew the upper collar into the neckline with a seam width of 1 cm.
Windproof Zipper Underlap
1 Fold the Zipper Underlap (5) pieces face inwards, pin them together, and face with a seam width of 0.7 cm (0,27″).
2. Cut out a corner and round, lay a finishing line with a width of 0.5 cm (0,2″).
3. Secure the untreated cut to the width of the foot.
4. Pin one part of the zipper to the windproof plank and topstitch, bending the upper edge of the zipper with a plank on the notch.
5. Lay the plank with the zipper down on the left detail of the Front Panel along the edge of the lapel, pin on the notches, and topstitch.
6. Fasten the zipper and on the second part mark all control points (hood (collar) insertion seam, stitching lines, end of the zipper). Pin the zipper to the right detail of the Front Panel along the edge of the lapel and stitch, aligning the control points.
7. Fasten the zipper and make sure that al lines and seams are symmetrical.
LINING
1. Pin and stitch the shoulder and side cuts of the Front Lining (1) and Back Lining with Fold (2), stitch with aseam width of 1cm (0,39″), iron the seams and press towards the back.
2. Pin and stitch the Center Hood Lining (12) to the Side Hood Lining pieces (11) with a seam width of 1cm (0,39″).
3. Pin and sew the hood into the lining neckline with a seam width of 1cm (0,39″), iron the seam upwards.
VEST ASSEMBLY
1. Pin the lining along the edge of the lapel and face, hitting the zipper stitching line.
2. Lay a finishing and securing line on the lining at a distance of 0.5 cm from the seam.
3. Secure the lining along the neckline, aligning shoulder seams and the central part of the back lining and vest, with a stitch at a distance of 0.5 cm (0,2″) from the cut.
4. Pin and stitch the lining to the vest in the hood (collar), armholes, and bottom of the garment.
5. Prepare the elastic for processing the uncovered cuts (hood, armholes, bottom). Cut the elastic according to the patterns (13), (14), (15).
6. Stitch the elastic for the armholes into a ring with a seam width of 1cm. Mark the control points on the elastic and pin, evenly stretching and distributing the fit.
7. Topstitch the elastic from the lining side at 0.2 cm (0,08″) from the edge, then, bending the cuts, pin and topstitch from the front side along the elastic at 0.2 cm (0,08″) from the edge.
8. Steam the stitched elastic with an iron, not touching the garment (at a distance). 9. Iron the finished product.
