
Vicenza men's shirt sewing pattern - sewing tutorial
PATTERN DESCRIPTION
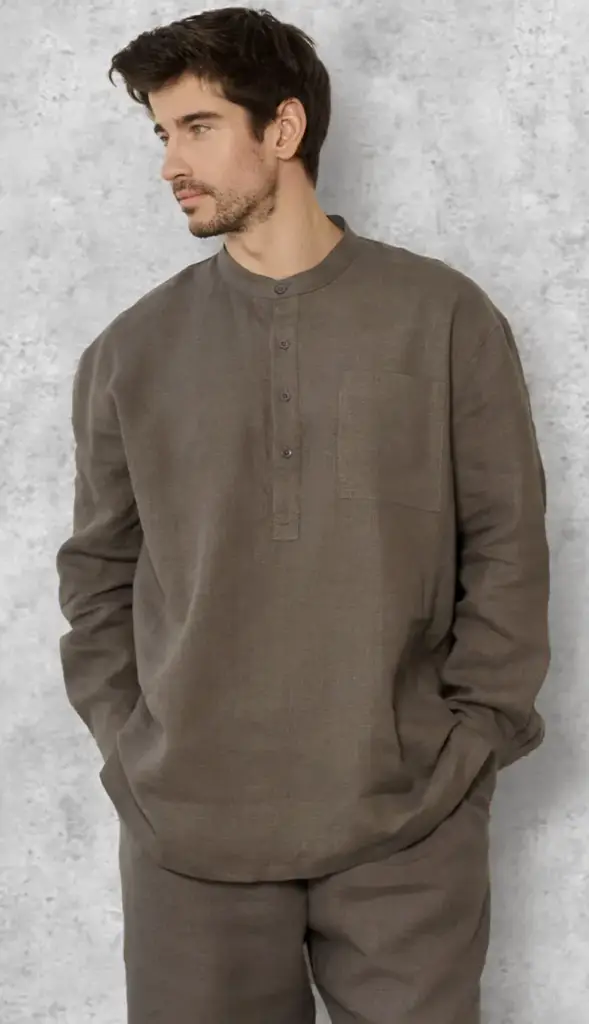
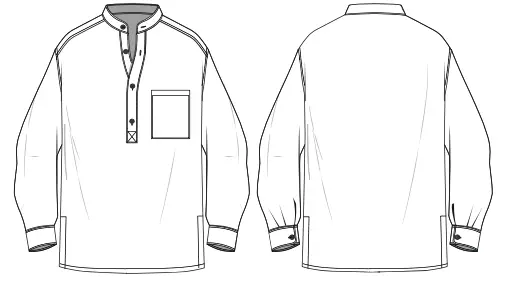
The shirt of a straight silhouette features small slits at the bottom of the side seams, with a stand-up collar, long sleeves with cuffs. It features a short placket along the front with buttonholes and buttons and a patch pocket in the chest area.
SUGGESTED MATERIALS
Natural fabrics are well suited for sewing shirts: cotton, linen.
ALSO NEEDED
• Buttons — 6 pcs.;
• Interfacing — 30 cm (11 ⅞”).
FABRIC REQUIREMENT (CM/IN)
for French terry fabric width 1.80 m (2 yd), rib knit 1.20 m (1 ⅜ yd)
|
International Size \ European size |
S-M / 46-48 |
L-XL / 50-52 |
2XL-3XL / 54-56 |
4XL-5XL / 58-60 |
|---|---|---|---|---|
| Main fabric, m | 1,45 | 1,50 | 1,50 | 1,55 |
| Main fabric, yd | 1 ⅝ | 1 ⅝ | 1 ⅝ | 1 ¾ |
When purchasing fabric, please account for shrinkage and buy 5—10% more than required.
SEAM ALLOWANCES
Pattern pieces already include seam allowances.
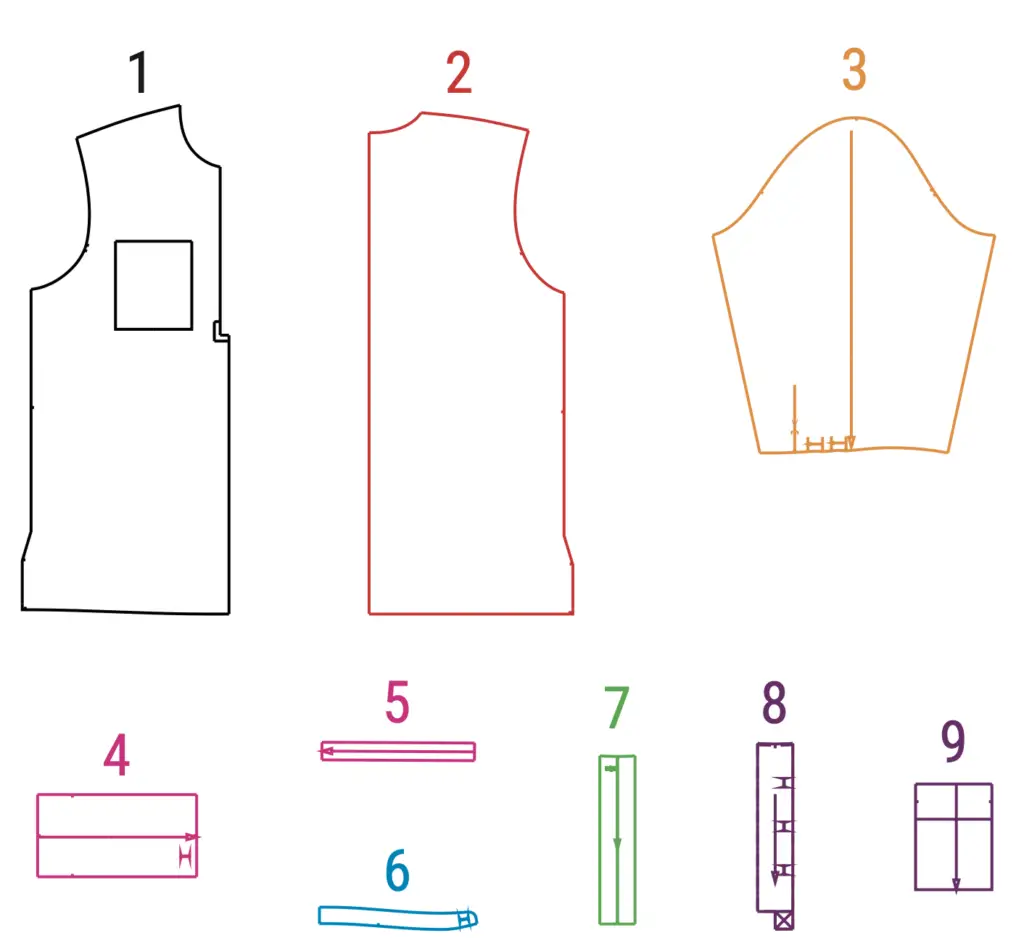
SPECIFICATIONS
(№ – Name – Pieces’ quantity)
Main fabric:
1 – Front with a fold – 1
2 – Back with a fold- 1
3 – Sleeve – 2
4 – Cuff – 2 + Interfacing
5 – Sleeve placket – 2
6 – Stand with a fold – 2 + Interfacing
7 – Right placket – 1 + Interfacing
8 – Left placket – 1 + Interfacing RIGHT SIDE
9 – Pocket – 1
TOTAL EASE ALLOWANCES
(in cm and in)
• Chest ease — 18 cm (7 ⅛”);
• Waist ease — 30 cm (11 ⅞”);
• Hips ease — 14 cm (5 ½”);
• Shoulder ease — 8.5 cm (3 ½”).
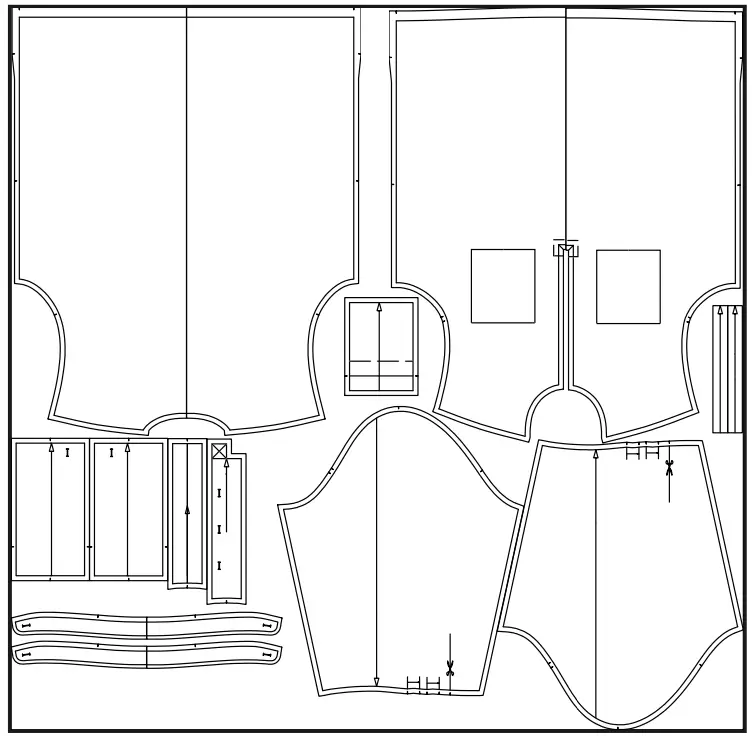
PATTERN PIECES
INTERFACING
Cuff (4), stand (6), right placket (7), left placket (8). Interface the allowance in the bottom part of the placket cut on the front piece (1), pocket allowances (9).
LAYOUT OF PARTS ON FABRIC
MAIN FABRIC
Width of fabric — 1.50 m (1 ⅝ yd)
Size — 46 (S)
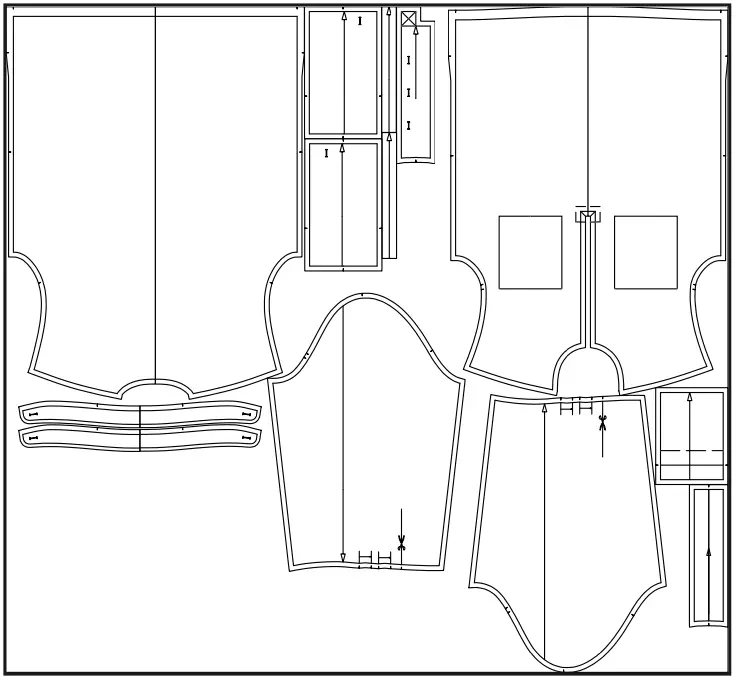
Size — 60 (5XL)
SEWING INSTRUCTIONS
PATCH POCKET
1. Press the seam allowances of the top edge of the pocket (9) by 1 cm (3/8’’) and 3 cm (1 ⅛’’).
2. Stitch the top corners of the pocket. To do this, fold the allowances to the right side and make a stitch.
3. Turn it right side out and press the side and bottom seams to the wrong side.
4. Topstitch the pressed top seam allowance to secure it.
5. Using the pattern, mark the location of the pocket on the front piece (1). Pin and stitch at 0.1 cm (1/16’’) from the edge. Press.
PLACKETS
6. Mark the lines for stitching the plackets on the wrong side of the front (1).
7. Press the right placket (7) in half with the wrong side inward, also press one long section at 1 cm (3/8’’) from the edge.
8. Press the left placket (8) in half with the wrong side inward, also press the longest cut and the bottom one at 1 cm (3/8’’) from the edge.
9. Mark a stitching seam on the unpressed long edge of the plackets.
10. Sew the plackets to the previously chalked lines on the front part from the wrong side.
11. Cut the front allowance to the stitching lines, not reaching 0.1 cm (1/16’’) from the stitching lines.
12. Press the seam allowances of the stitched plackets onto the plackets.
13. Fold the plackets to the right side, place the ironed edge of the placket to the stitching line on the right side, and stitch it at 0.1 cm (1/16’’) from the edge. Press.
14. Place the left one on the right placket, turn the bottom allowances to the right side and secure the ends of the plackets with machine stitches.
15. Place the remaining edge of the top placket on the front piece and stitch first around the perimeter and then diagonally. Press.
SHOULDER SEAMS
16. Place the front piece (1) on the back (2), stitch and overlock the shoulder seams. Press allowances to the back.
17. Topstitch along the shoulder seam at 0.2 cm (1/16’’). Press.
STAND COLLAR
18. Press one of the parts of the stands (6) with an allowance of 1 cm (3/8’’) for stitching it into the neck.
19. Place one part of the stand on top of another and overlock along the curved cut. Cut out curves, turn inside out and press.
20. Insert the stand with the unpressed cut into the neckline from the wrong side. Sew in, press seam allowance onto the stand.
21. Pin and stitch the pressed seam allowance of the second stand from the front side at 0.2 cm from the edge, continuing this stitch along the entire perimeter of the stand. Press.
SLEEVES
22. Sew 2 folds along the bottom of the sleeve (3), pointing them towards the slit.
23. Press the sleeve placket piece (5) in half, and press one side in half again inside out.
24. Sew it to the slit from the wrong side. Press seam allowances towards the placket.
25. Place the opposite pressed edge of the placket to the stitching line on the right side and stitch at 0.1 cm (1/16’’) from the edge.
26. Fold the finished placket in half from the wrong side and stitch the top corner at 45 degrees.
27. Pin and stitch the sleeves into the open armhole, folding them right sides together. Overlock seam allowances and press towards the shirt.
28. Topstitch along the entire length of the armhole on the shirt side at 0.2 cm (1/16’’) from the stitching seam.
29. Overlock the cut allowances on the front and back from the front side, from the bottom and just above the slit starting point by 10 cm (4’’).
30. Sew the bottom seam of the sleeve and the side seam of the shirt in one line to the starting point of the slit, overlock the allowances and press to the back. Press the side seam allowances at 10 cm (4’’) above the slit.
31. Press the cuffs (4) in half, and press one long edge at 1 cm (3/8’’) to the wrong side.
32. Fold the cuff over to the wrong side and sew both sides. Turn out and press.
33. Pin the cuff with the unpressed edge to the bottom of the sleeve from the wrong side. Fold the side of the placket that is near the notches to the wrong side and align it with the cut of the cuff.
34. Sew, press allowances onto the cuff.
35. Turn the cuff right side out, apply the pressed edge to the stitching line on the front side and secure it with a machine stitch that turns into a topstitch along the entire perimeter of the cuff. Press.
SHIRT HEM
36. Overlock the shirt along the bottom of the front and back. Press the hem allowances by 2 cm (3/4’’). Press the cut allowances along the side seams by 1.5 cm (3/4’’).
37. Stitch the corners of the cut using an allowance along the bottom line. Turn out and press.
38. Stitch the bottom and press.
39. Secure the cut allowances along the side seams along the entire length and press.
40. Mark the buttonholes and buttons on the front placket, stand and sleeve cuffs according to the pattern. Make buttonholes and sew on the buttons.
41. Give the shirt the final press.