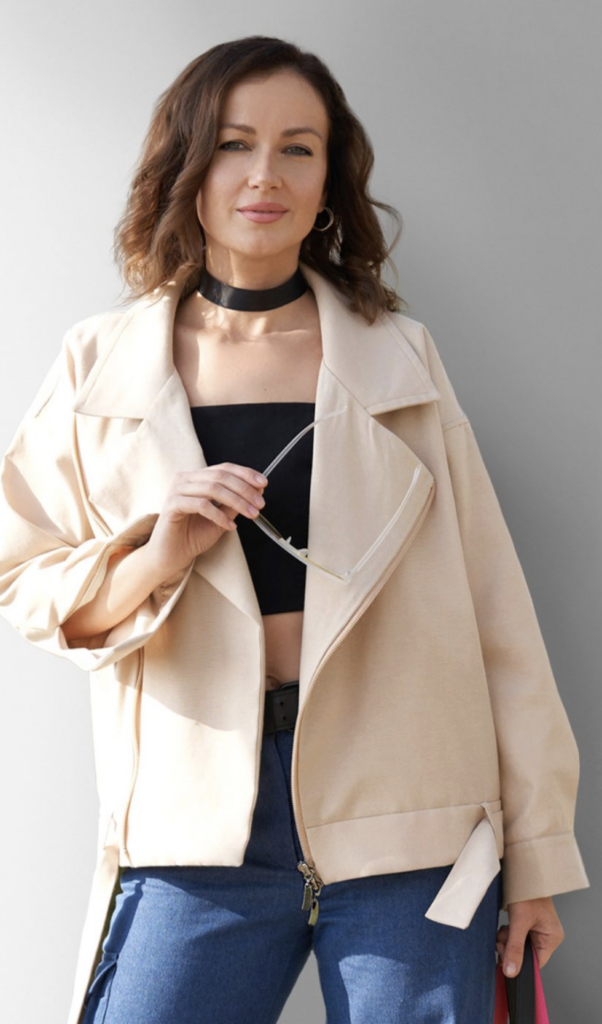
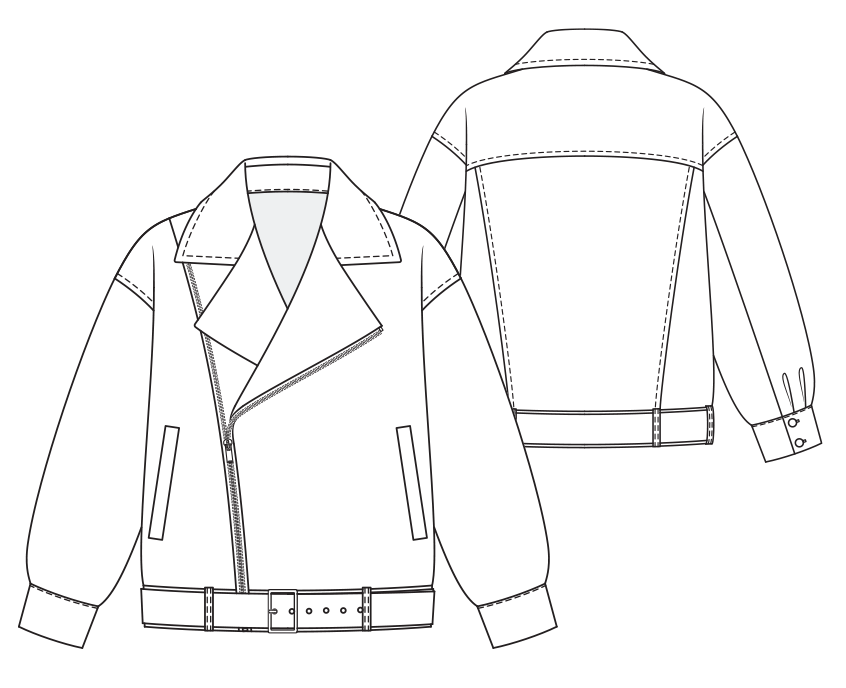
Stylish loose-fitting biker jacket. The jacket has a turn-down collar with lapels. There are welt pockets on the front. Sleeves have buttoned cuffs. Jacket’s bottom features detachable belt with a buckle.
We recommend to use denim or heavy weighted cotton fabrics.
• Lining 30 cm (11,8”);
• Interfacing 120 cm (47,3”);
• 7 grommets;
• 1 buckle;
• Open end zipper 50 cm (19,7”);
• 4 buttons.
|
International Size \ European size |
XXS-XS / 34-36 |
S-M / 38-40 |
L-XL / 42-44 |
2XL-3XL / 46-48 |
|---|---|---|---|---|
| Main fabric, m | 2,05 | 2,25 | 2,40 | 2,50 |
| Main fabric, yd | 80,7 | 88,6 | 94,5 | 98,4 |
Please account for shrinkage, it is recommend to wash your fabric before the cut.
Pattern pieces already include 1 cm (0,39”) seam allowances for all edges.
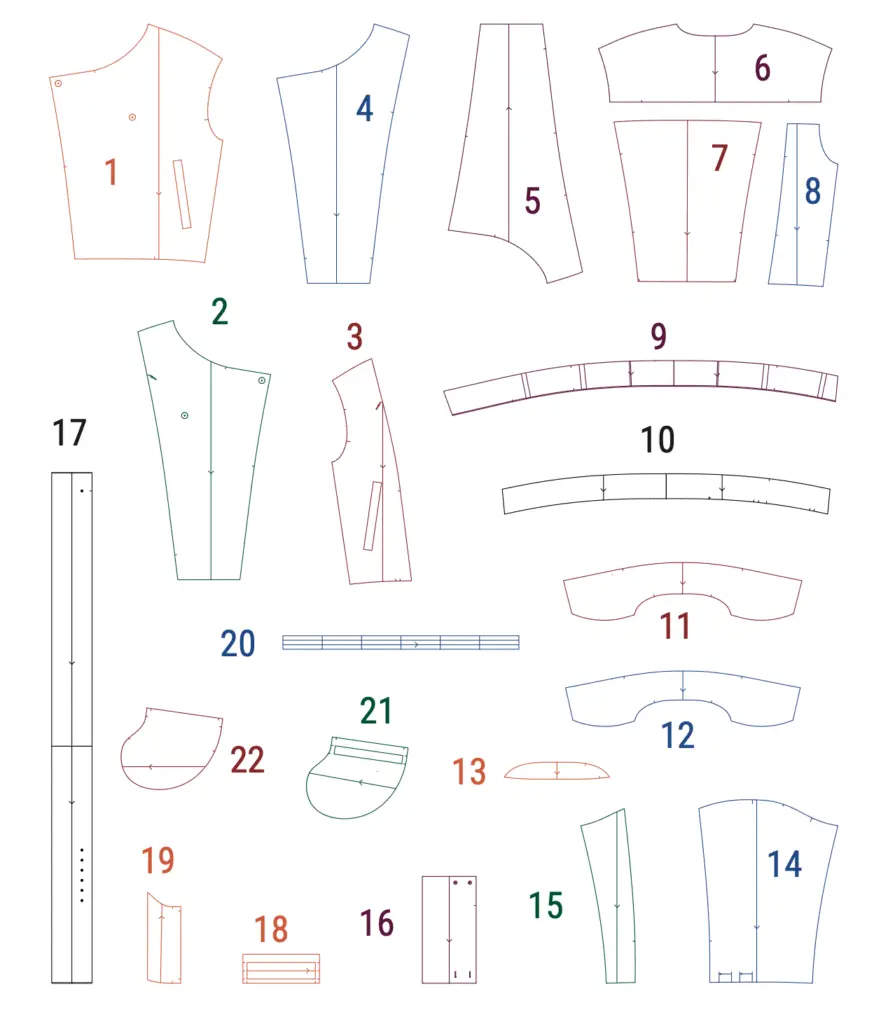
(№ – Name – Pieces’ quantity)
Main fabric:
1 – Left front – 1
2 – Right front – 1
3 – Right front side – 1
4 – Right front facing – 1 + Interfacing
5 – Left front facing – 1 + Interfacing
6 – Back yoke – 1
7 – Back – 1
8 – Back side – 2
9 – Top waistband – 1 + Interfacing
10 – Under waistband – 1 + Interfacing
11 – Top collar – 1 + Interfacing
12 – Under collar – 1 + Interfacing
13 – Collar stand – 2 + Interfacing
14 – Top sleeve – 2
15 – Bottom sleeve – 2
16 – Cuff – 2 + Interfacing
17 – Belt – 1 + Interfacing
18 – Welt – 1 + Interfacing
19 – Pocket facing – 2
20 – Belt loop – 1
Lining
21 – Top pocket bag – 2
22 – Bottom pocket bag – 2
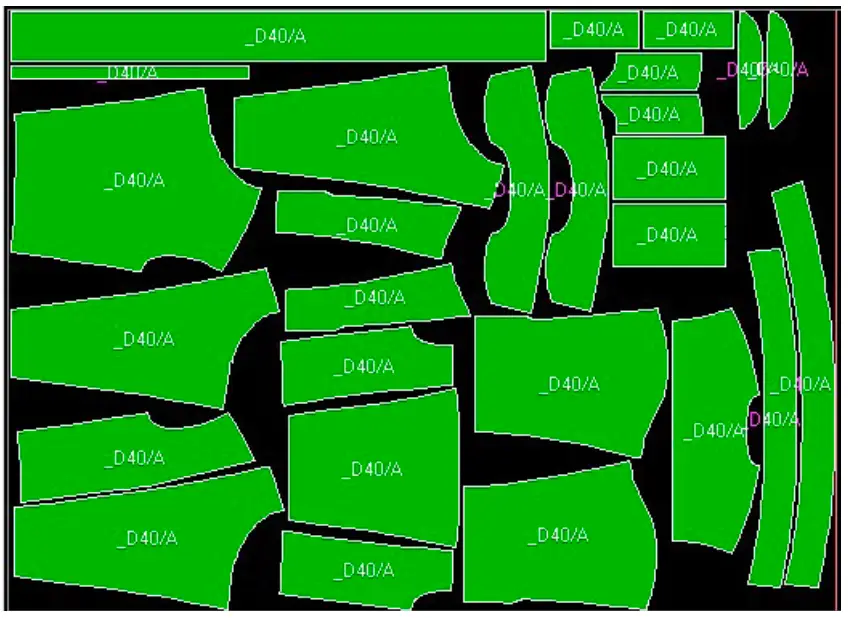
Width of fabric — 1.50 m (1 ⅝ yd)
Size — 34 (XXS)
Size — 48 (XXXL)
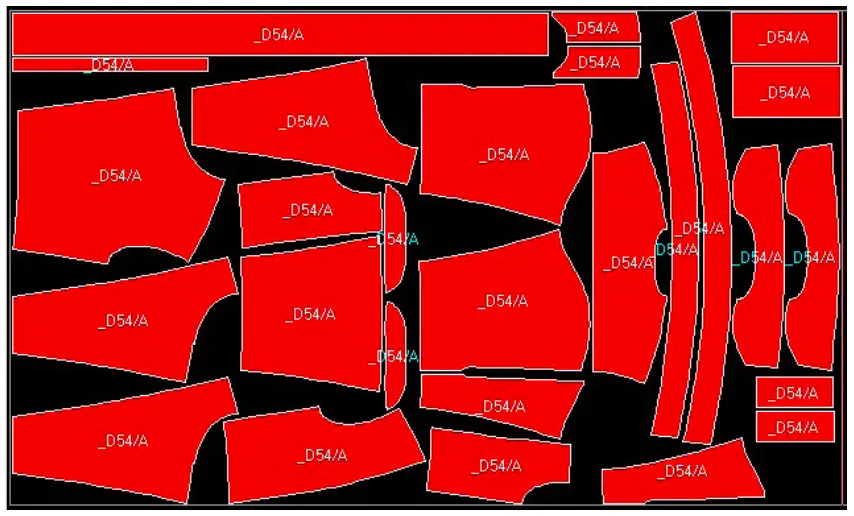
Right front facing (4), left front facing (5), top waistband (9), under waistband (10), top colar (11), under collar (12), colar stand (13), cuffs (16), belt (17), welt (18).
WELT POCKETS
1. Fuse the interfacing to the pocket area on the left front (1) and right front side’s (3) wrong side. The piece of the interfacing should be 1 cm longer and wider than the pocket marking.
2. Fold the welt (18) along the line wrong side inside. Press.
3. Line up the lower edge of the pocket marking with your welt piece, right sides together. Stitch along the marked line.
4. Stitch the bottom pocket bag (22) to the raw edges of the welt, excactly where the first seam line is.
5. Overlock the lower edge of the pocket facing (19). Put it over the top pocket bag (21) and stitch close to the overlock seam. Обметываем внутренний срез подзора кармана (19). Attention! Instead of 2 pieces (a top pocket bag (21) and a pocket facing (19)) you can cut just 1 long pocket bag from the main fabric.
6. Line up the top pocket bag (21) with the upper edge of the pocket marking right sides together. Stitch and press. Turn up the welt – its fold must be exactly where the pocket bag’s seam is. Two seams must be parallel.
7. Turn the pieve over. Using sharp little scissors, cut along the center between two lines, stop 2 cm from either end. Cut on a diagonal towards each corner, stopping 0.1-0.2 cm (0,04 – 0,08 in) from the stitching.
8. Turn the welt and pocket bags to the wrong side of the garment, placing the welt carefully. Stitch together the welt ends and V-shape cuts along the line of the pocket frame.
9. Press slightly from the right side. Your pocket frame should be perfect, with sharp corners and parallel sides.
10. Pin and stitch the pocket bags.
11. Finish the seam allowance with overlock stitching or with a bias tape. Press.
JACKET
1. Pin and stitch together the right front piece (2) and the right front side piece (3) starting from the shoulder and finishing by the zipper’s notch.
2. Finish the seam allowance overlock stitching or with a bias tape finishing 2 cm before the notch.
3. Pin and stitch together the back (7) and the back sides (8). It is better to make lapped seam here.
4. Sew together the yoke (6) and the back piece using the lapped seam. Press.
5. Sew shoulder seams with the lapped seam.
6. Pin the top waistband (9) to the garment’s bottom edge. Stitch.
SLEEVE
1. Finish the seam allowances of the top sleeve (14) and the bottom sleeve (15) with the overlock seam or a bias tape.
2. Stitch back sleeve seams from the upper edge to the cut notches. Press the seam allowance open.
3. Make pleats according to notches.
4. Sew the sleeve cap into the open armhole using a lapped seam.
5. Sew the underarm and side seams using a French seam. Press seam allowances towards the front. Topstitch from the right side of the garment.
CUFFS
1. Fold cuffs (16) in half the right side inside.
2. Stitch the short ends together finishing the seam 1 cm (0,39”) before the raw edges.
3. Turn the right side out and press.
4. Pin one of the cuff’s raw edges to the bottom of the sleeve. Stitch.
5. Press the seam allowance towards the cuff.
6. Fold towards the wrong side the seam allowance of cuff’s another edge. Baste to the seam.
7. Stitch along the contour, close to the seams.
8. Mark buttonholes.
9. Make buttonholes, sew the buttons.
BELT LOOPS
1. Overlock long edges of the belt loops (20). Press one edge towards the wrong side. Then press another one over it with a 0.8 cm (0,32”) width overlap.
2. Stitch 2 parallel lines right next to the edge of both ends.
3. Cut into equal parts.
4. Stitch belt loops to the top waistband (9) where indicated.
5. Pin the top belt to the jacket’s bottom matching the notches. Stitch. Press the seam allowance towards the belt.
ZIPPE
1. Stitch one side of the zipper between the right front piece (2) and right front side piece (3). Start from the zipper notches and finish 1 cm before the top belt’s bottom edge.
2. Finish the seam allowance with overlock seam or a bias tape.
3. Stitch the second side of the zipper to the left front piece (1). Start 1 cm below the upper edge and finish 1 cm above the bottom.
4. Finish the outer edges of the right (4) and left front facing (5) with overlock seam or a bias tape.
5. Pin facings to the jacket. Sew along the lapels and front edges to the notches.
COLLAR
1. Stitch collar stands (13) to the top collar (14) and undercollar (15). Press seam allowances open.
2. Pin collars together and stitch. Trim the corners. The top collar is a little larger than the under colar.
3. Turn the collar the right side out. Put between the jacket and front facings.
4. Stitch up to the notches.
5. Turn the garment the right side out and press.
6. Stitch the undercollar to the back’s neckline. Trim where notches are.
7. Press the collar stand seam allowances towards the collar.
8. Press the top collar seam allowance towards the wrong side.
9. Handstitch the stand of the top collar to the neckline.
10. Topstitch the contour close to the seams.
WAISTBAND
1. Press the under waistband (10) upper seam allowance towards the wrong side.
2. Stitch the under waistband short edges to the front facings.
3. Pin and stitch the top and the under waistbands bottom edges.
4. Pin and baste the under waistband’s upper edge over the seam. Ditch stitch from the right side, fixing the waistband into its place.
5. Put the belt (17) details right sides together.
6. Pin and stitch one short and two long edges.
7. Trim the corners and turn the right side out. Press.
8. Topstitch at the foot width.
9. Install grommets.
10. Put the open end into the buckle, hide raw edges and stitch.
11. Give the garment a final press.