How to sew an elegant evening dress for special occasions

PATTERN DESCRIPTION
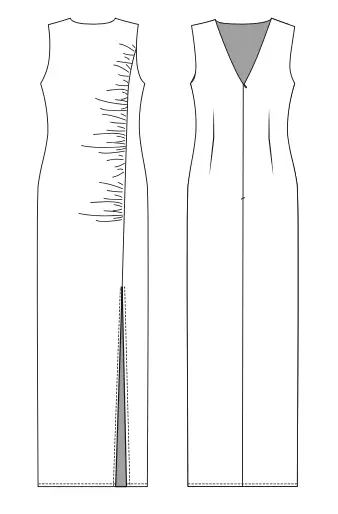
Maxi length dress with a fitted silhouette, asymmetrical at the front. The front has a gathered seam, starting from the side panel on the left, and a large cut in the lower part. The back has an invisible zipper and waist darts.
SUGGESTED MATERIALS
Knitted fabrics of medium density, with good stretch capability.
ALSO NEEDED
• Invisible zipper — 0.35 m (13 ¾”);
• Tape interfacing — 1.70 m (66 ⅝”);
• Fabric for bands — 0.50 m (19 ⅝”) you can use thin cotton or polyester lining.
FABRIC REQUIREMENT (CM/IN)
for fabric width 1.50 m (1 ⅝ yd)
Attention! Please account for shrinkage and buy 5-10% more than required.
|
International Size \ European size |
XXS-XS / 34-36 |
S-M / 38-40 |
L-XL / 42-44 |
2XL-3XL / 46-48 |
|---|---|---|---|---|
| Main fabric, m | 1,75 | 1,80 | 1,85 | 1,85 |
| Main fabric, yd | 68 ½" | 70 ⅞" | 72 ⅞" | 72 ⅞" |
SEAM ALLOWANCES
Pattern pieces already include 0.7 cm (1/4”) seam allowances for all edges.
Attention! The armhole band (4) and neck band (5) already contain allowances, there is no need to add anything.
Attention! Since the front of the dress is asymmetrical, the patterns are marked “RIGHT SIDE”.
SPECIFICATIONS
(№ – Name – Pieces’ quantity)
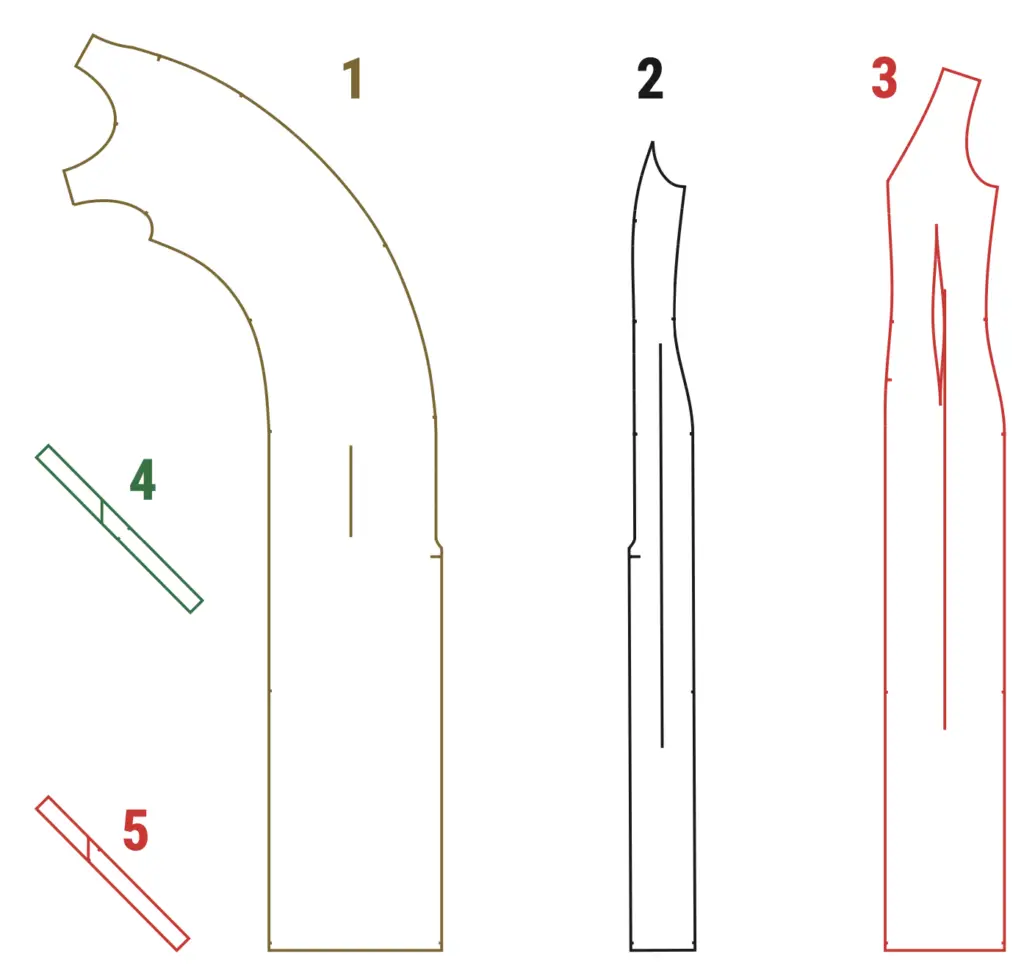
Main fabric:
1 – Centre front (right side) – 1
2 – Side panel – 1
3 – Back – 2
4 – Folded armhole band – 2
5 – Folded neck band – 1
TOTAL EASE ALLOWANCES
(in cm and in)
• Chest ease — 2 cm (¾”);
• Waist ease — 9 cm (3 ½”);
• Hip ease — 3 cm (1 ⅛”).
PATTERN PIECES
INTERFACING
Interface the cut allowances on the front (1) and side panel (2) and the zipper allowances on the back (3) pieces with tape interfacing.
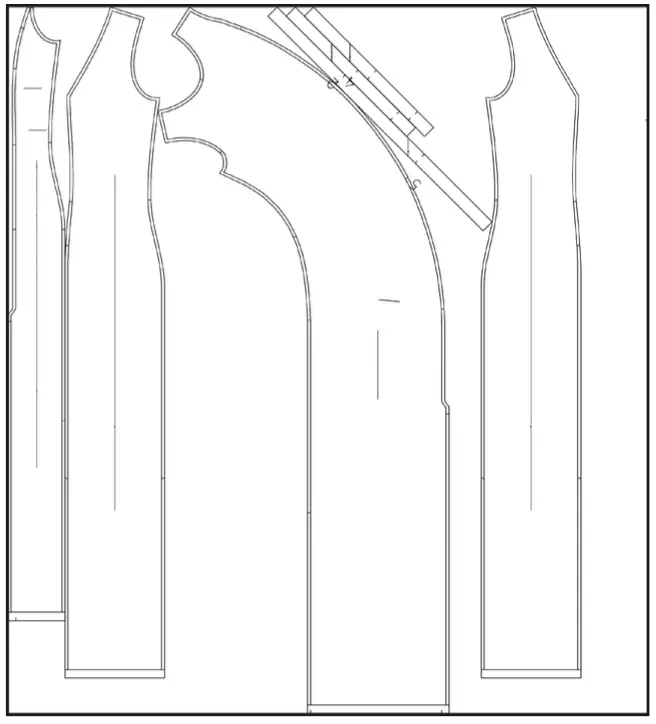
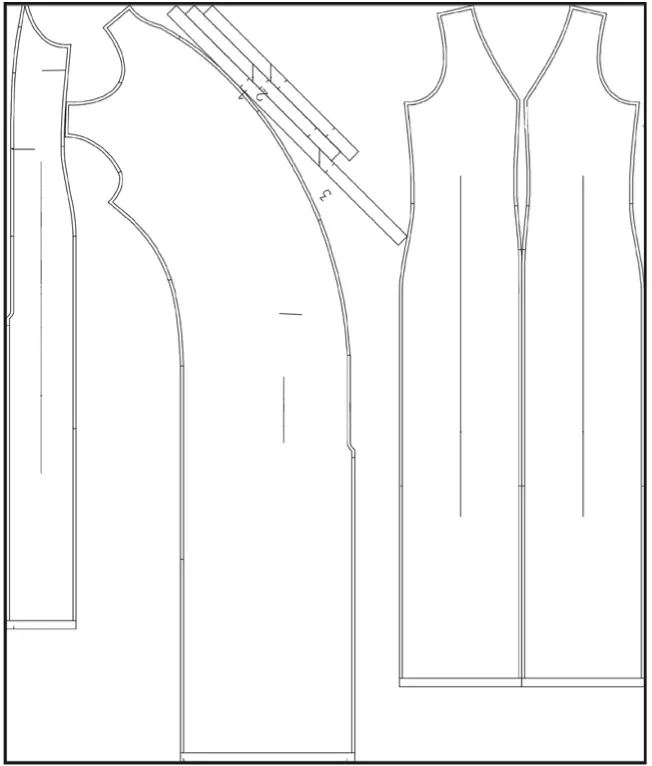
LAYOUT OF PARTS ON FABRIC
Width of fabric — 1.50 m (1 ⅝ yd)
Size — 34 (XXS)
Size — 48 (XXXL)
FRONT GATHERING DETAIL (1)
| 34 (XXS) | 36 (XS) | 38 (S) | 40 (M) | 42 (L) | 44 (XL) | 46 (2XL) | 48 (3XL) |
|---|---|---|---|---|---|---|---|
| 47 cm | 47,5 cm | 47,5 cm | 48 cm | 48,5 cm | 48 cm | 49 cm | 49 cm |
| 18 1/2” | 18 7/10” | 18 7/10” | 18 7/8” | 19 1/10” | 18 7/8” | 19 1/4” | 19 1/4” |
SEWING INSTRUCTIONS
FRONT
1. Interface the cut allowances with tape interfacing on the front piece (1) and the side panel (2).
2. Overlock the cut allowances to the bottom, starting from the end of the gathered seam.
3. Gather the left side cut on the front (1), to do this, stitch 2 parallel lines from the notch to the control point of the end of the gathered seam, reaching the required size of the gathering detail.
4. Stitch the central front with the side panel until you reach the beginning of the cut. Press the allowance to the side panel. Overlock to the end of the gathered seam and press on the side panel.
5. Then press the seam allowances on the top. Press the cut allowances too.
6. Topstitch the cut allowances. Press it.
BACK
1. Mark the darts on the back (3) according to the pattern, making the dart smooth, and press it to the middle seam.
2. Interface the zipper allowances and stitch 10 cm (4”) below the zipper notch.
3. Sew the middle seam of the back from the notch to the zipper, overlock and press. Press the seam allowance from the bottom to the reference mark, then press it open.
4. Stitch one part of the zipper to the back, placing the zipper to the front side of the central cut.
5. Then stitch the other side and press the zipper. You can pin the edge of the zipper to the seam allowance.
DRESS ASSEMBLY
1. Reinforce the shoulder sections along the back. Overlock the shoulder seams together. Press seam allowances to the back.
2. Overlock the side seams together and press to the back.
3. Fold the neck band (5) in half and press. Sew the band to the neckline using a 0.5 cm (1/5”) seam.
4. Topstitch the band 0.1 cm (1/25”) from the stitching seam.
5. Press the band on the wrong side, straightening the edging from the main fabric.
6. Topstitch the edge of the band. Press it.
7. Stabilize the top allowance of the zipper and the band.
8. Sew armhole bands (4) into a ring and press seam allowances. Fold it in half and press it.
9. Pin in the band and sew to the armholes with a 0.5 cm (1/5”) seam.
10. Topstitch around the armhole bands 0.1 cm (1/25”) from the stitching seam.
11. Press the bands on the wrong side, straightening the edging from the main fabric.
12. Topstitch the edge of the band. Press it.
13. Overlock the bottom of the dress, press it to the wrong side and topstitch the edge of the allowance.
14. Give the garment a final press.
