Sew a practical and stylish women's jacket with patch pockets

PATTERN DESCRIPTION
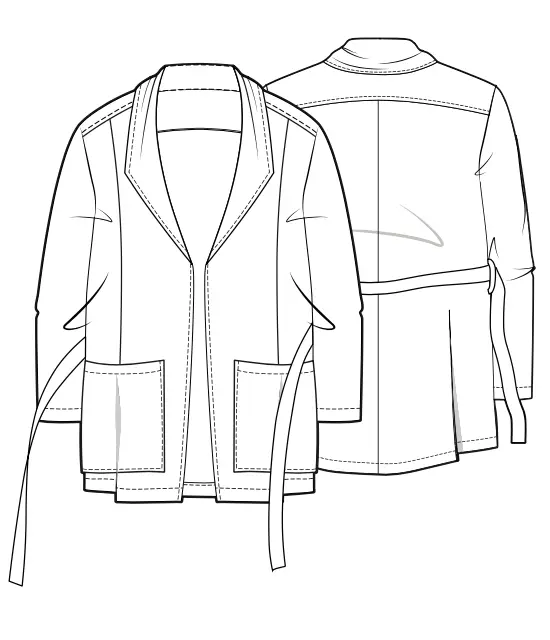
Sakura jacket features the collar, princess seams and patch pockets on the front. The back has got double yoke and the center seam. The jacket has long sleeves and the belt. There are two options of length.
SUGGESTED MATERIALS
We recommend to use medium weight knitted fabrics such as jersey, French terry or lighter weight sweatshirting.
ALSO NEEDED
• Interfacing 135 cm (53,1”).
FABRIC REQUIREMENT (CM/IN)
for fabric width 1.50 m (59,1 in)
|
International Size \ European size |
50-52 | 54-56 | 58-60 | 62-64 |
|---|---|---|---|---|
| Main fabric for pants, m | 3,05 | 3,15 | 3,25 | 3,35 |
| Main fabric for pants, in | 120,1 | 124,0 | 128,0 | 131,9 |
The fabric use does not include possible shrinkage. Please account for shrinkage and buy 5—10% more than required.
SEAM ALLOWANCES
Pattern pieces already include 0,7 cm (0,27”) seam allowances for all edges.
SPECIFICATIONS
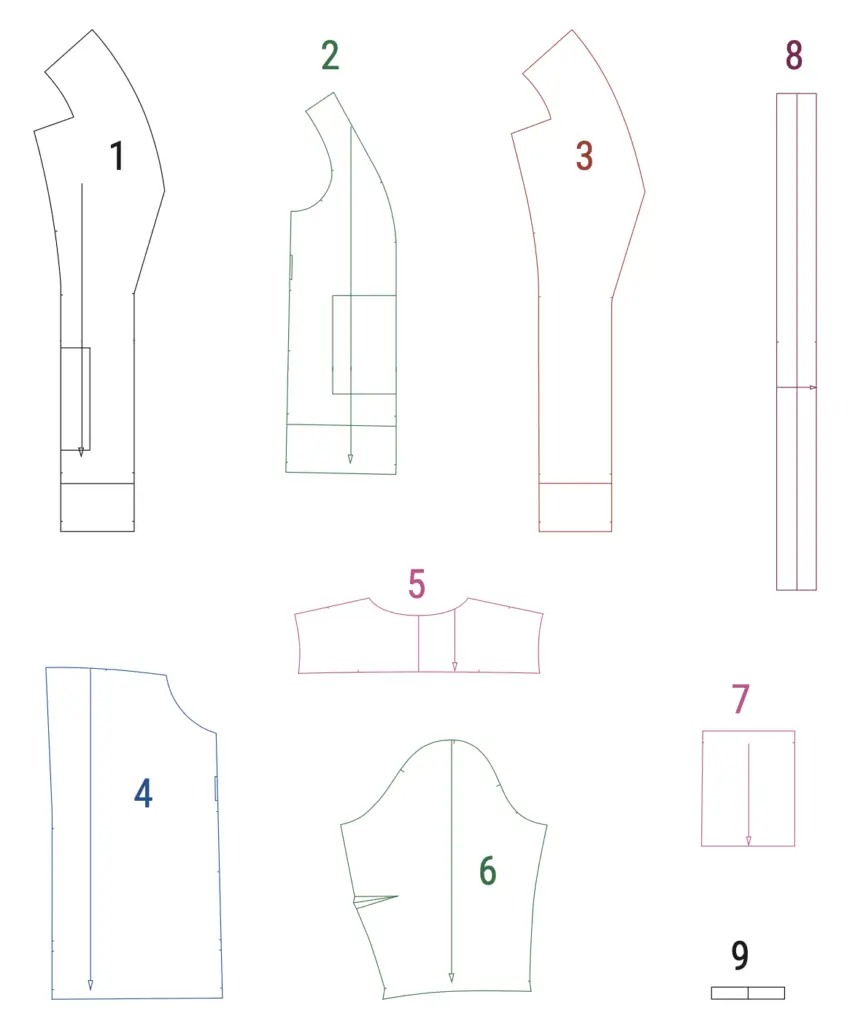
(№ – Name – Pieces’ quantity)
Main fabric:
1 – Front – 2
2 – Front side- 2
3 – Front facing – 2 + interfacing
4 – Back – 2
5 – Yoke – 2
6 – Sleeve – 2
7 – Patch pocket – 2
8 – Belt – 2
9 – Belt loops – 1
PATTERN PIECES
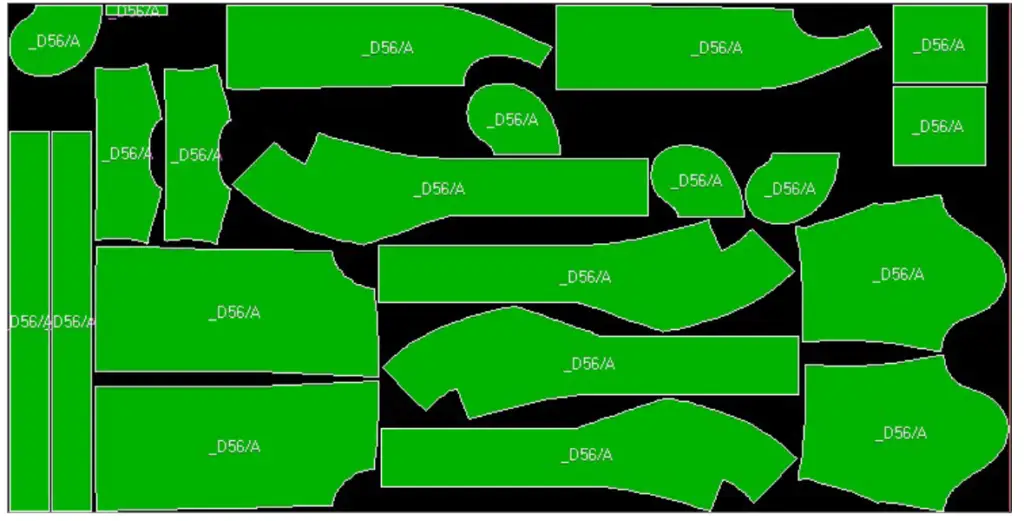
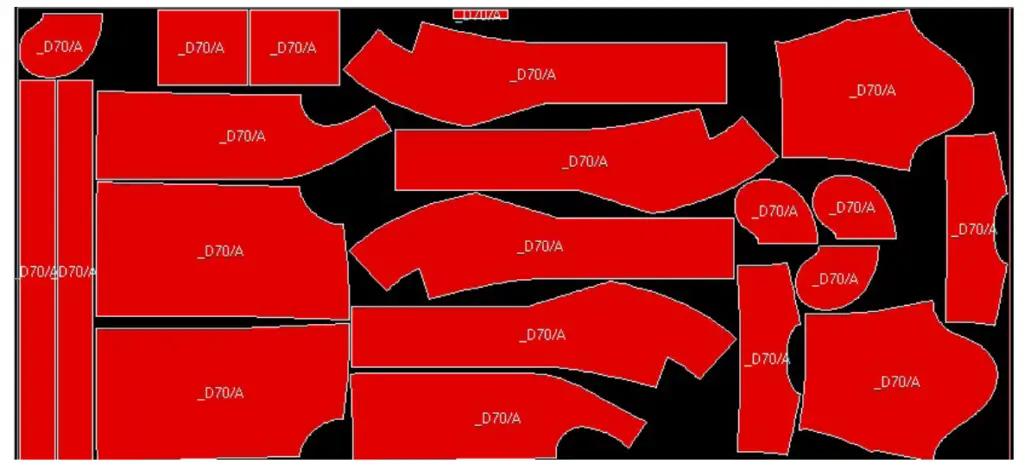
LAYOUT OF PARTS ON FABRIC
Main fabric
Width of fabric — 1.50 m (59,1 in)
Size — 50
Size — 64
INTERFACING
Facing (3).
SEWING INSTRUCTIONS
FRONT
1. Place together the front (1) and the front side (2) aligning notches. Stitch on the overlocker, press the seam allowance towards the front side.
2. Press the front hem allowance towards the wrong side according to the notches. Use 1 cm wide fusible stay tape to interface shoulder edges. Mark the placement of pockets as on the pattern.
POCKETS
1. Press patch pockets’ (7) seam allowances towards the wrong side. The seam allowance is 1 cm for three sides, and the upper edge should be pressed according to notches.
2. Finish the upper edge.
3. Fold the upper edge over to the right side, stitch short sides to the pocket. Trim corners, Turn the upper fold right side out and poke out the corners, press flat. Topstitch the seam allowance.
4. Pin pockets to the front pieces according to the markings on the pattern. Topstitch 0,2 cm (0,08”) away from the edge. Press.
5. Pin front pieces right sides together and stitch stand’s edges. Press the seam allowance open.
FRONT FACING
Attention! If your fabric is extremely stretchy, we recommend to interface the collar part.
1. Put facing pieces (3) right sides together and stitch stand’s edges. Press the seam allowance open. Neaten inner edges.
2. Place the facing and the front right sides together aligning notches. Pin and stitch.
Trim extra fabric from thickenings. Turn the piece right way out and press flat.
Topstitch the facing 0,5 cm (0,2”) away from the edge.
PREPARING THE BACK
1. Pin and stitch together back pieces (4), press the seam allowance towards any side.
2. Put the back between yokes (5). Pin and stitch using the overlocker. Press the seam. Topstitch the yoke with 0,5 cm (0,2”) stitch length.
3. Press the back’s hem allowance.
4. As we have double yoke, shoulder seams and the neckline seam can be hidden. Stitch the outer yoke to the front and the inner yoke to the facing. Press neckline seams open and hand stitch them together.
5. Pin and stitch shoulder seams. Press seam allowances towards the back.
6. Topstitch shoulder seams 0,5 cm (0,2”) away from the original stitching.
7. Pin and stitch side seams on the overlocker. Press seam allowances towards the back.
SLEEVES
1. Stitch the elbow darts (6), press flat, then press towards the upper edge.
2. Pin and sew the shape and underarm seam (6) on the overlocker. Press shaping the sleeve.
3. Pin or baste the sleeve cap to the armhole, making sure that the corresponding nicks match perfectly and distributing the excess fabric evenly between the markings. Sew on the overlocker. Press from the sleeve’s side not crossing the seam. Press the seam allowance towards the sleeve.
PUTTING THE GARMENT TOGETHER
1. Finish the garment’s hem and the sleeves hem. Topstitch.
2. Sew facings to the front’s princess seams stitching 0,2—0,3 cm (0,07—0,12”) away from edges.
3. Make loops (9) using any method that is convenient for you. Pin and sew the belt loops on where indicated.
BELT
1. Sew the belt pieces right side together, press the seam allowance open.
2. Fold the belt in half lengthwise wrong side inside, press flat.
3. Fold the belt in half right side inside, pin and stitch leaving a 4 cm (1,57”) opening for turning it right way out. Trim corners.
4. Turn the piece right way out, press flat.
5. Give the garment a final press.
