

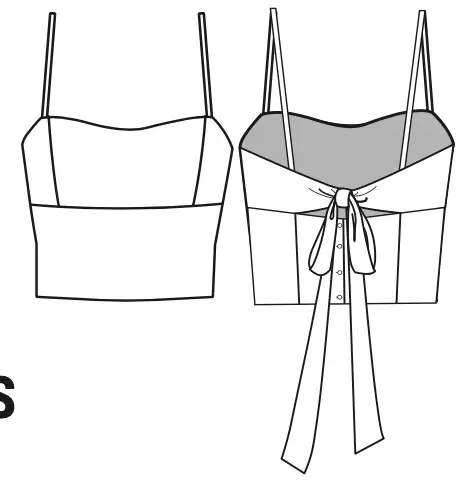
The top features straps, waist length, raised seams along the front. The back has a decorative bow tie at the top and a fastening with buttons at the bottom. The top is lined with main fabric.
For sewing you can use: linen, cotton, muslin, poplin.
• Buttons — 4 pcs.;
• Interfacing tape — 2.50 m (2 ¾ yd).
|
International Size \ European size |
XXS-XS / 34-36 |
S-M / 38-40 |
L-XL / 42-44 |
2XL-3XL / 46-48 |
|---|---|---|---|---|
| Main fabric, m | 0,70 | 0,75 | 0,75 | 1,80 |
| Main fabric, yd | ¾ | ⅞ | ⅞ | ⅞ |
When purchasing fabric, please account for shrinkage and buy 5—10% more than required.
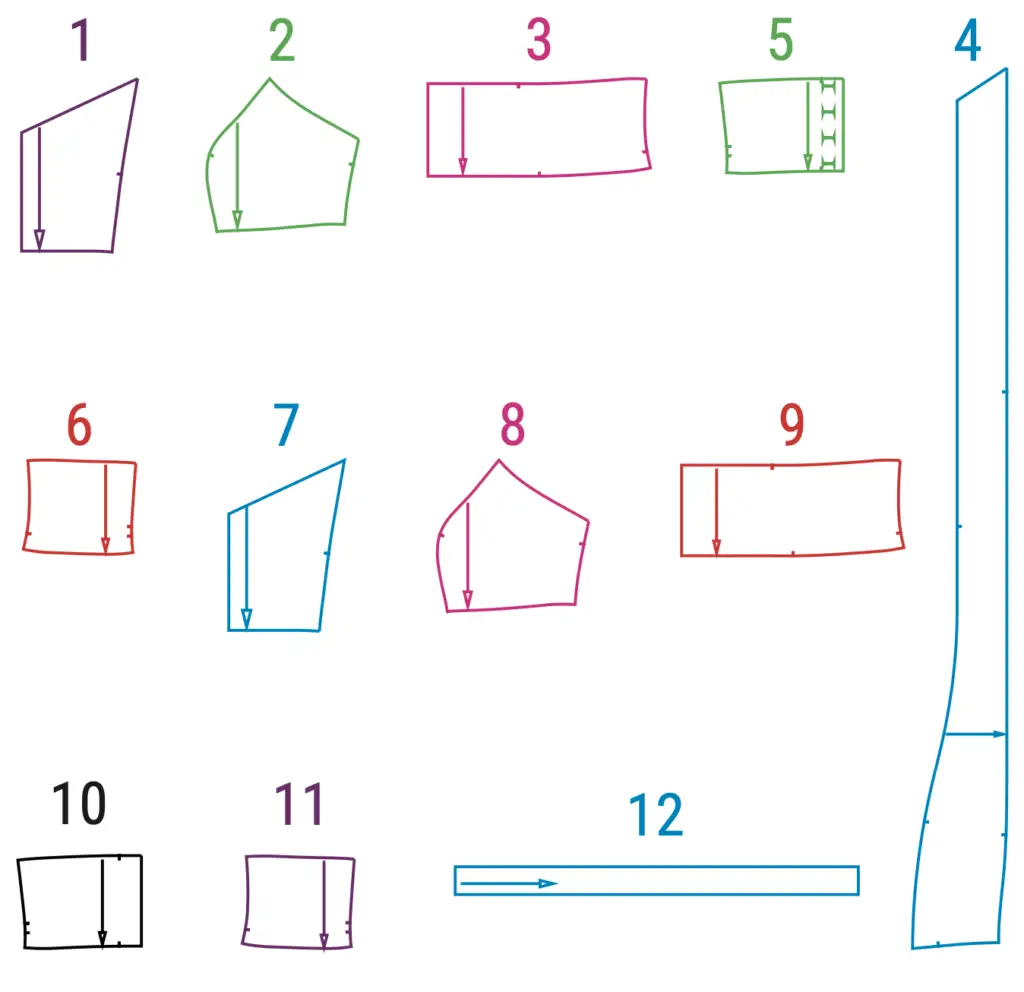
Pattern pieces already include seam allowances.
(№ – Name – Pieces’ quantity)
Main fabric:
1 – Front top with a fold – 1
2 – Front side – 2
3 – Front bottom with a fold – 1
4 – Bow die – 4
5 – Back center – 2
6 – Back side – 2
7 – Top facing with a fold – 1
8 – Front side facing – 2
9 – Front bottom facing – 2
10 – Back center facing – 2
11 – Back side facing – 2
12 – Strap – 2
• Chest ease — 4 cm (1 ⅝”);
• Waist ease — 2 cm (3/4″).
Interface the allowances: upper cuts of the top facing (7), of the front side facing (8), back center facing (10); bottom cuts of the front bottom (3), back center facing (10), back side facing (11).
Important! If you are sewing from thin fabric, we recommend interfacing the area
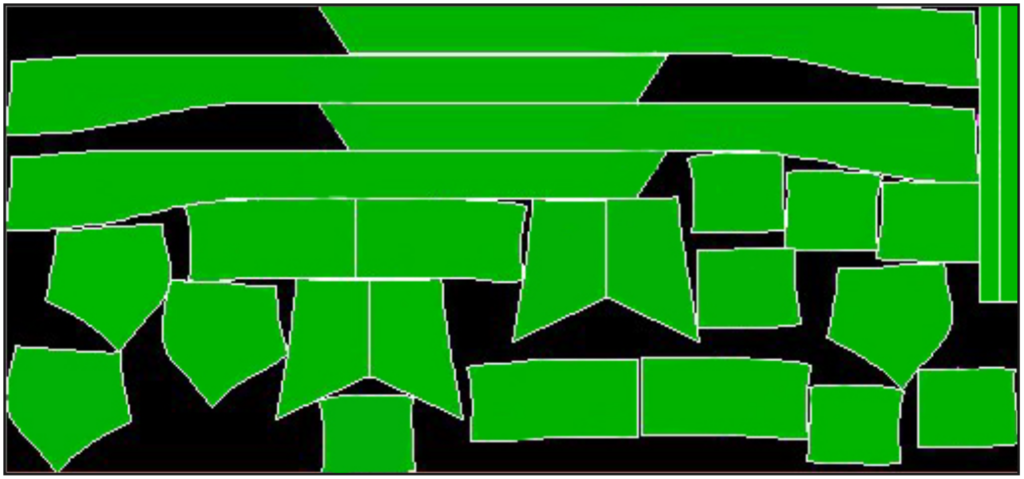
Width of fabric — 1.50 m (1 ⅝ yd)
Size — 34 (XXS)
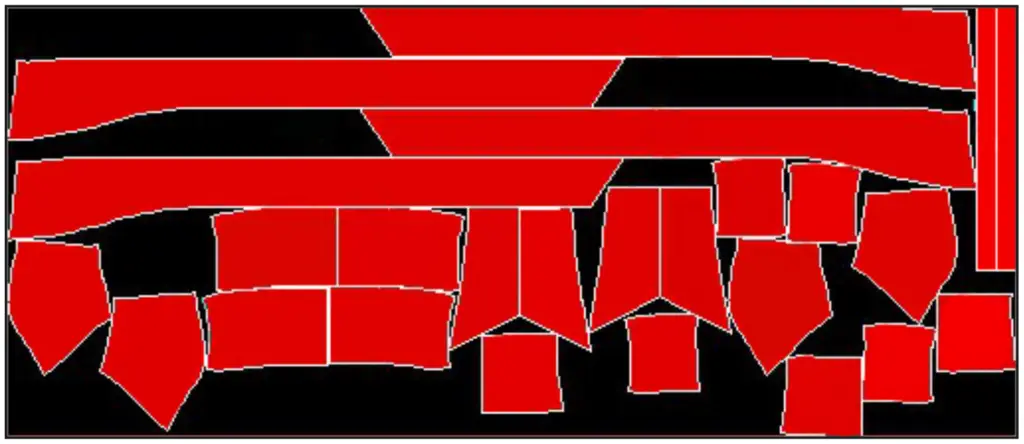
Size — 48 (XXXL)
BACK
1. Stitch the pieces of the bow (4) along the bottom edge, starting from the notch, folding
them right side inward. Cut out corners and turn it to the right side. Press.
2. Stitch the back center piece (5) with the back side (6), placing the pieces right sides together. Press allowances.
3. Stitch the back center facing (10) with the back side facing (11), placing the pieces right sides together. Press allowances.
4. Place the back pieces right sides together on the back facings and sew along the top edge from the princess seam, the central and bottom edges. Cut out corners and turn onto the right side.
5. Place the upper edge of the back and bow and the facing with the bottom bow right sides together and stitch. Press seam allowances down.
6. Topstitch along the top and bottom sides of the back along the back facings at 0.1 cm (1/16’’) from the facing seam.
7. Stitch the side cuts of the back pieces together at 0.5 cm (3/16’’) from the edge.
FRONT
1. Place the upper part of the front (1) and the front side (2) right sides together and stitch. Press seam allowances towards the center.
2. Sew the front bottom piece (3) to the bottom edge of the top pieces, placing the pieces right sides together. Press seam allowances down.
3. Place the top facing (7) and the front side facing (8) right sides together and stitch. Press seam allowances towards the center.
4. Stitch the front bottom facing (9) to the bottom edge of the front right sides together. Press seam allowances down.
STRAP PREPARATION
1. Press the strap piece (12) in half with the wrong side inward and along the allowance again in half to the fold.
2. Stitch along the pressed edges. Press.
ASSEMBLING
1. Stitch the upper edge of the top by placing the front and facing pieces right sides together and inserting the straps along the front. Notch the corner.
2. Topstitch along the facing at 0.1 cm (1/16’’) from the seam. Press the top seam allowance, forming an edging from the top piece.
3. Stitch the bottom edge of the top and facing pieces, placing the pieces right sides together. Turn out and press.
4. Turn the top inside out and insert one side of the back into one side seam, placing the right sides of the back pieces on the front of the main front pieces. Sew the side seam.
5. Insert the second side piece of the back into the second side seam of the front and first stitch the back to the upper top pieces, and then stitch the upper and bottom with front facing at 5 cm (2’’), leaving an unstitched opening.
6. Turn the top inside out through the opening, pin the opening and stitch along the side seam, as well as along the second side seam for symmetry.
7. Transfer the chalk from the bow pattern to the strap (there is a notch on the pattern) and secure the strap with a double hem seam.
8. Mark the buttonholes, make them and sew on the buttons.
9. Give the top a final press.
ZIPPER
1. Unzip the zipper and stitch it on one side of the sundress. Zip and transfer the control marks to the second side of the zipper.
2. Unzip and stitch the other side of the zipper. Press.
3. Stitch the end of the zipper to the middle seam allowance. Press.
4. Sew the top ends of the zipper so they don’t stick out. Press.
5. Hem the bottom of the sundress, press along the notches on the wrong side and topstitch.
6. Thread the straps into the loops and give the sundress a final press.