
Lily women's T-shirt sewing pattern - sewing tutorial

PATTERN DESCRIPTION
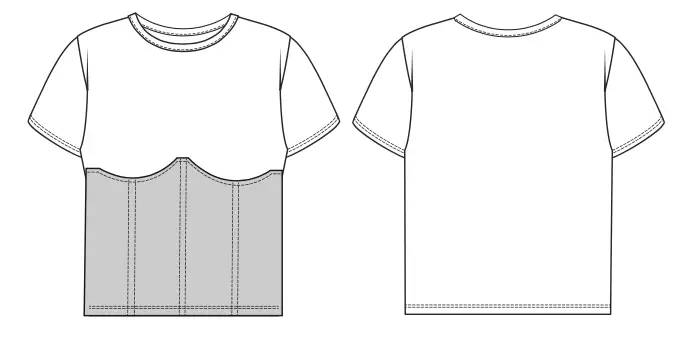
Loose-fitting T-shirt with patch pieces on the front. It has mid-thigh length. It features a tapered neckline and short set-in sleeves.
SUGGESTED MATERIALS
We recommend using thin knitted fabric with elastane; for patch pieces use denim or cotton.
ALSO NEEDED
• Silicone shoulder gripper tape — 30 cm (11 ⅞”);
• Neck tape — 30 cm (11 ⅞”);
• Denim for patch pieces — 40 cm (15 ¾”).
FABRIC REQUIREMENT (CM/IN)
for fabric width 1.50 m (1 ⅝ yd)
|
International Size \ European size |
XXS-XS / 34-36 |
S-M / 38-40 |
L-XL / 42-44 |
2XL-3XL / 46-48 |
|---|---|---|---|---|
| Main fabric, m | 0,70 | 0,80 | 0,85 | 0,90 |
| Main fabric, yd | ¾ | ⅞ | 1 | 1 |
When purchasing fabric, please account for shrinkage and buy 5—10% more than required.
SEAM ALLOWANCES
Pattern pieces already include 0.7 cm (1/4”) seam allowances.
SPECIFICATIONS
(№ – Name – Pieces’ quantity)
Main fabric:
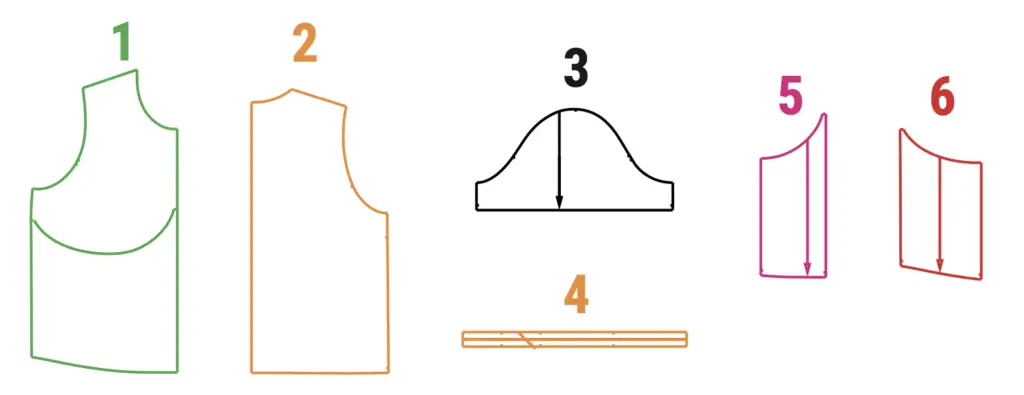
1 – Front with fold – 1
2 – Back with fold – 1
3 – Sleeve – 2
4 – Neck band – 1
Decorative fabric
5 – Patch front center piece – 2
6 – Patch side piece – 2
TOTAL EASE ALLOWANCES
(in cm and in)
• Chest ease — 7 cm (2 ¼”);
• Waist ease — 26 cm (10 ¼”);
• Hips ease — 3 cm (1 1/8″);
• Shoulder ease — 5 cm (2″).
PATTERN PIECES
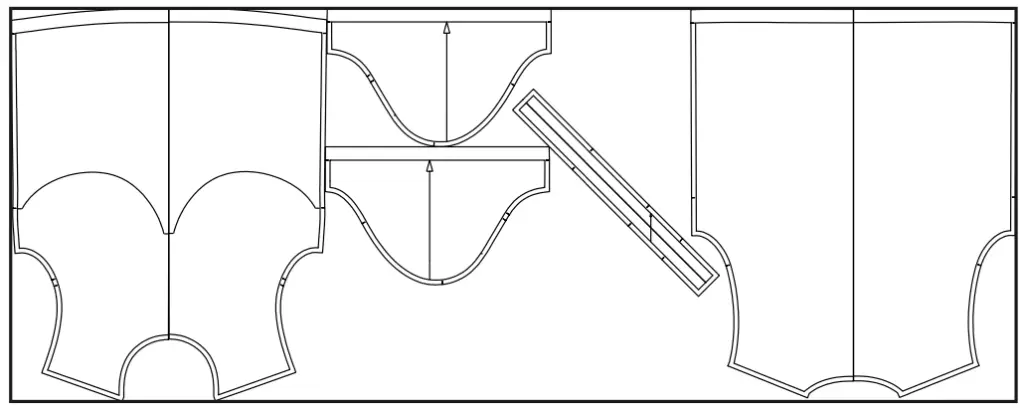
LAYOUT OF PARTS ON FABRIC
Width of fabric — 1.50 m (1 ⅝ yd)
Size — 34 (XXS)
Size — 48 (XXXL)
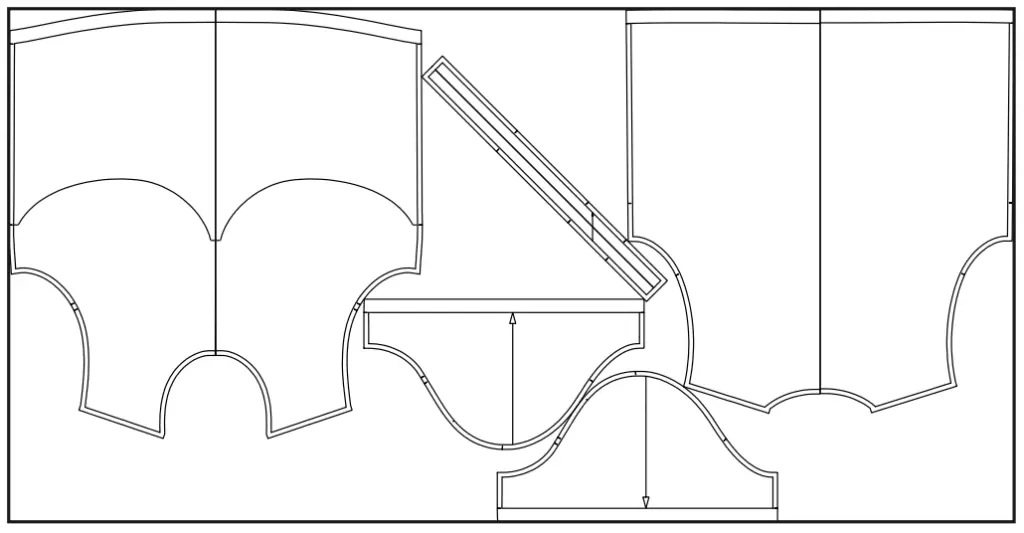
Width of fabric — 1.50 m (1 ⅝ yd)
DECORATIVE FABRIC
SEWING INSTRUCTIONS
PATCH PIECES
1. Sew the middle seam of the central part of the patch piece (5). Press allowances.
2. Sew the sides of the patch pieces (6) to the central parts (5). Press seam allowances towards the center.
3. Topstitch at 0.5 cm (3/16’’) along these seams. Press.
4. Make a stitch along the top edge of the patch piece, stepping 1 cm (3/8”) from the edge.
5. Using a hand needle, ruffle the fringe along the entire top edge.
6. Mark the location of the patch on the front (1)
7. Sew along the top edge, placing the needle of the sewing machine in the previously made topstitch. Also stitch on the side seams and bottom. Press.
T-SHIRT PREPARATION
8. Overlock and sew the shoulder seams of the front (1) and back (2) parts. Place silicone tape on the back side. Press seam allowances to the back.
NECKLINE BAND
9. Stitch the neck band (4) into a ring on the overlocker and press it in half.
10. Sew the neck band into the neckline using an overlocker. Align the neck band stitching seam together with the left shoulder seam. Press allowances onto the garment.
11. Topstitch along the front neckline at 0.1 cm (1/16’’) from the stitching seam.
12. Sew neck tape onto the back neckline. We recommend that you iron it before. The length of the neck tape is equal to the back neck seam from the shoulder seams plus 2 cm (3/4”) for the hem allowance.
13. Fold the allowances of the neck tape (1 cm (3/8”) on each side) to the wrong side and stitch its top edge to the back neck allowance. Stitch the bottom edge all the way through the back piece. Press.
SLEEVES
14. Sew the sleeves (3) into the armholes of the T-shirt. Press allowances onto sleeves.
15. Sew the side sections together with the sleeves at the same time in a go using an overlocker. Press seam allowances towards the back.
16. Press seam allowances along the bottom of the sleeves. Overlock and stitch with a double needle or on a flatlock machine. Press.
17. Press seams along the bottom of the T-shirt. Overlock and stitch the hem with a double needle or on a flatlock machine.
18. Give the T-shirt a final press.