
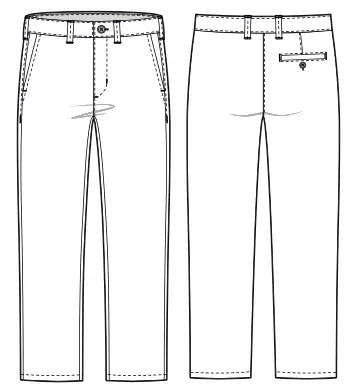
Indigo mens trousers sewing tutorial

PATTERN DESCRIPTION
Classic basic men’s trousers with a zipper and a stitched waistband. There are pockets in the side seams. There is a welt pocket on the back half. The model is suitable for business suits, as well as relaxed casual outfits for city walks.
SUGGESTED MATERIALS
To sew these trousers, we recommend medium-weight and density suiting fabrics.The perfect choice if the fabric content includes wool.
ALSO NEEDED
• Interfacing — 40 cm (15 ¾’’);
• lining — 40 cm (15 ¾’’);
• Hole flat button — 1 pc;
• Jigger button — 1 pc;
• Fly front zipper — 16 cm (6 ¼’’);
• Fusible bias tape to reinforce waistline seam — 1.20 m (1 ¼ yd).
FABRIC REQUIREMENT (CM/IN)
for fabric width 1.50 m (1 ⅝ yd)
|
International Size \ European size |
S-M / 40-42 |
L-XL / 44-46 |
2XL-3XL / 48-50 |
4XL-5XL / 50-52 |
|---|---|---|---|---|
| Main fabric, m | 1,50 | 1,65 | 1,80 | 1,90 |
| Main fabric, yd | 1 ⅝ | 1 ¾ | 2 | 2 ⅛ |
When purchasing fabric, please account for shrinkage and buy 5—10% more than required.
SEAM ALLOWANCES
Pattern pieces already include 1 cm (3/8″) seam allowances.
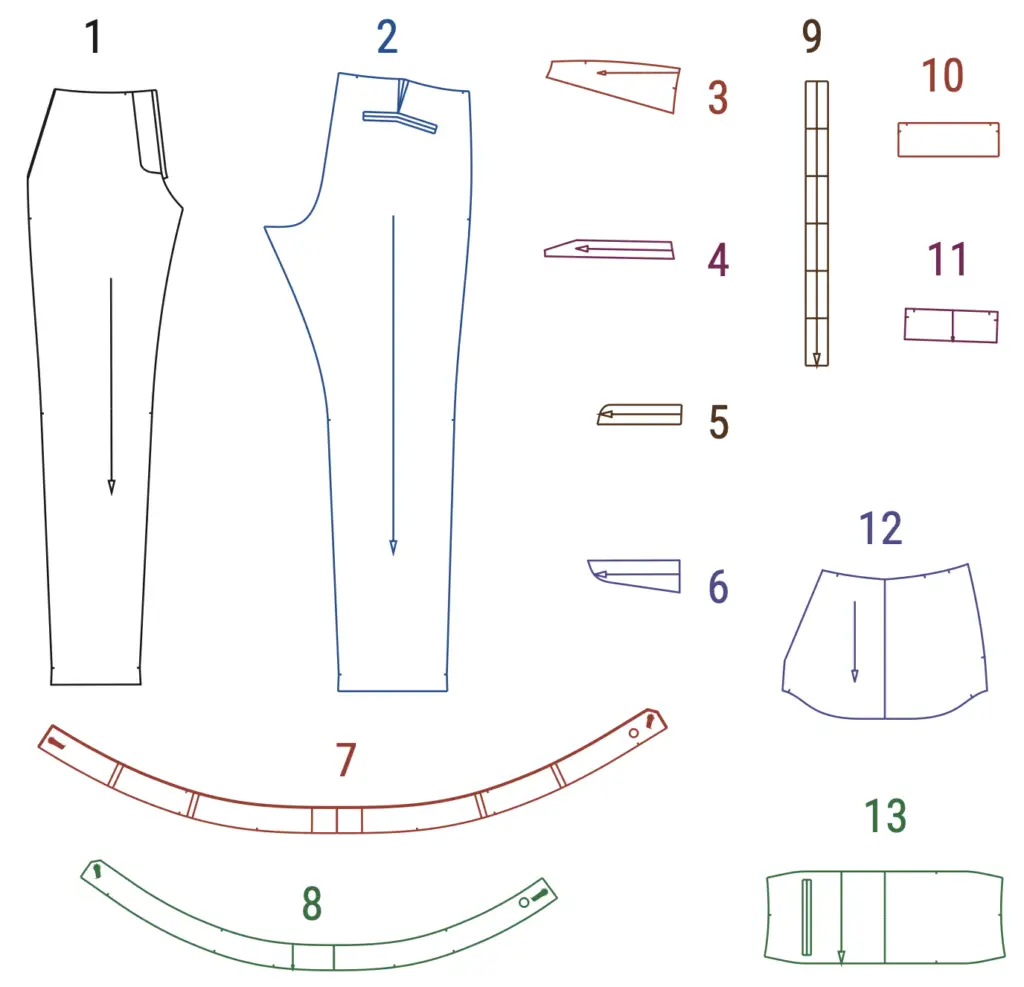
SPECIFICATIONS
(№ – Name – Pieces’ quantity)
Main fabric:
1 – Folded trouser – 2
2 – Back trouser – 2
3 – Side – 2
4 -Pocket facing – 2 + Interfacing
5 – Fly right side – 1 + Interfacing
6 – Fly catch right side – 1 + Lining wrong side
7 – Upper waistband – 1 + Interfacing
8 – Lower waistband – 1 + Interfacing
9 – Belt loop – 1
10 – Back pocket welt – 1 + Interfacing
11 – Back pocket facing – 1
Lining
12 – Side pocket bag – 2
13 – Back pocket bag – 1
TOTAL EASE ALLOWANCES
(in cm and in)
• Waistline ease — 4 cm (1 ⅝”);
• Hipline ease — 4 cm (1 ⅝”);
• Thigh ease — 9 cm (3 6/10”).
PATTERN PIECES
INTERFACE THE FOLLOWING PIECES
Pocket facing (4), fly (5), upper waistband (7), lower waistband (8), Back pocket welt (10).
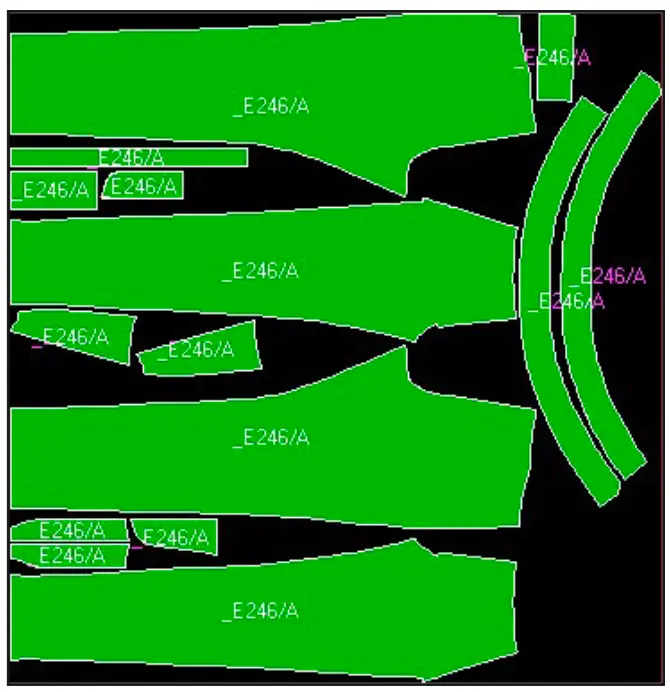
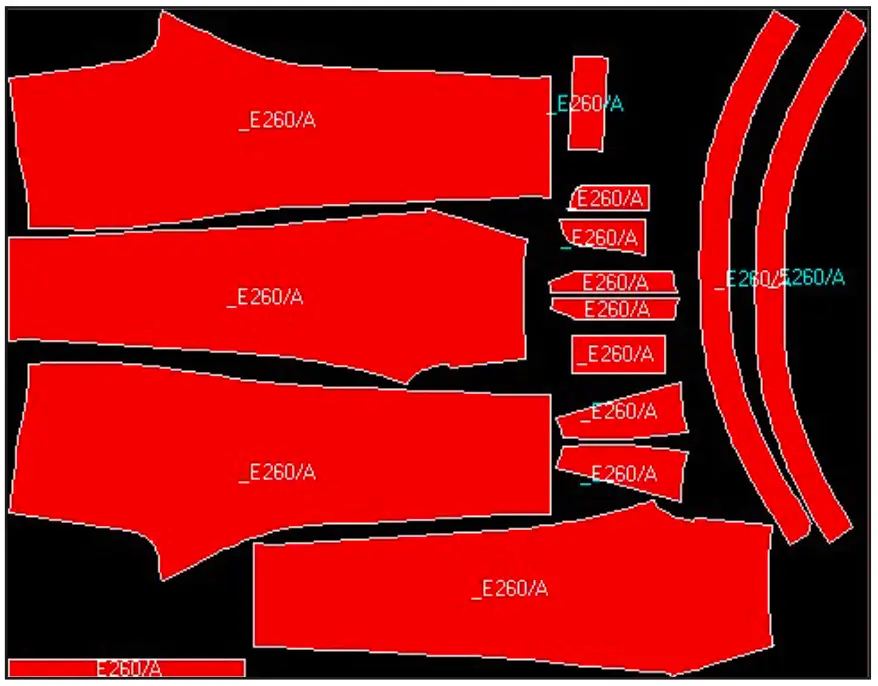
LAYOUT OF PARTS ON FABRIC
Width of fabric — 1.50 m (1 ⅝ yd)
Size — 40 (S)
Size — 54 (5XL)
LINING FABRIC
Width of fabric — 1.50 m (1 ⅝ yd)
All sizes

INTERFACING
Width of fabric — 1.50 m (1 ⅝ yd)
Size – 40 (S)

Size – 54 (5XL)

SEWING INSTRUCTIONS
SIDE SEAM POCKETS
1. Pin and stitch the side (3) and the facing of the pocket entrance (4) onto the pocket bag (12). Before it, overlock or zigzag the edges of the pieces. Press.
2. Place the facing (4) with the right side on the front part of the trousers (1) to the cut of the entrance to the pocket, pin it and stitch. The stitching line should be at 0.7 cm ( 1/4”) from the edge.
3. Topstitch at 0.2 cm (1/16”) from the stitching seam along the facing.
4. Press the facing to the wrong side, and topstitch along the front side of the pocket entrance at 0.5 cm (just under 1/4”) from the edge.
5. Fold the pocket bag (12) along the notches and stitch the bottom edge of the lining. Overlock the seam.
6. Pin and stitch the pocket along the waistline and side seam, aligning the notches. Press the finished pocket.
WELT POCKET
1. Sew the darts on the back trousers (2), press them to the center.
2. Press the welt part (10) 2/3 of the part along the notches, overlock or zigzag the long section.
3. Overlock or zigzag one longest section of the back pocket facing (11).
4. Interface the pocket area on the right trouser half (2) from the wrong side.
5. Following the markings on the patterns, mark the pocket entrance on the right side of the back trouser half.
6. Mark its width on a welt and place it on the bottom line of the pocket frame with the fold down, the main part of the welt faces up.
7. Pin or baste the welt onto the bottom line of the frame.
8. Mark a seam at 1 cm (3/8”) from the edge on the back pocket facing (11). Pin or baste it to the top line of the frame.
9. Stitch the welt and the back pocket facing, check the width between the stitching lines of the parts; it should be equal to the width of the finished welt.
10. Place the back pocket bag (13) on the wrong side of the trousers and pin it in the area of the frame and the waist. Stitch it right on the previous stitch of the welt and the back pocket facing.
11. Cut the entrance to the pocket in the center between the lines, not reaching the edge of the pocket 2 cm (3/4”). Trim the corners, not reaching the line 0.1 cm (1/16”). Turn the welt and the back pocket facing inside out, straighten the corners and fix them. Press.
12. Stitch the welt onto the lining along the overlocked seam allowance. Since the lining is one-piece, fold it towards the waistline and press the fold. Pin to the top and stitch the back pocket facing along the overlocked seam allowance.
13. Sew the side seams of the lining. Then overlock or zigzag it. Secure along the waistline at 0.5—0.7 cm (1/4”) from the edge.
14. Press the finished pocket.
FLY
1. Overlock or zigzag the middle sections of the front trousers.(1).
2. Overcast the rounded edge of the fly (5).
3. Sew the fly to the middle section of the front half of the trousers. Topstitch at 0.2 cm (1/16”) from the stitching seam along the fly. Press it and press inside out.
4. Prepare the fly catch (6). Overstitch two pieces. The stitching line should be at 0.7 cm (1/4”). Then fold them right sides together, turn them inside out and press them. Topstitch 0.2 cm (1/16”) along the hemmed seam. Overlock or zigzag the raw edge.
5. Place the zipper to the overlocked seam allowance of the fly catch. Then place the pressed front trouser on the zipper. Pin and stitch close to the zipper at 0.2 cm (1/16”) to the pressed fold.
6. Stitch the middle seam of the front trousers to the fly seam. Make another stitch at 0.2 cm (1/16”) along the seam to the fly.
7. Place the fly evenly on the fastened zipper, bend the trouser half and pin the fly onto the zipper. Stitch the zipper close to the chain and close to the second seam along the edge of the zipper.
8. Topstitch along the front side of the fly. Fix the fly and the fly catch from the wrong sidebelow.
TROUSERS ASSEMBLING
1. Pin and stitch the seat seam. Overlock or zigzag and press the seam allowances. Topstitch along the seam at 0.2 cm (1/16”) from the edge.
2. Pin and stitch following the notches and aligning the side cuts. Overlock or zigzag seam allowances, then press to the back halves of the trousers.
3. Stitch along the side seam from the waistline to the end of the pocket at 0.2 cm (1/16”) from the edge.
4. Press the bottom of the trousers first 1 cm (3/8”), then another 2.5 cm (1 1/8’’).
5. Pin and stitch inner seams, aligning the notches. Overlock or zigzag seam allowances, press them to the side of the back trousers.
6. Topstitch along the bottom of the trousers and press.
LOOPS
1. Overlock or zigzag one longest section of the belt loop piece (9).
2. Place the unsewn section towards the center of the part and cover it with the overlocked allowance.
3. Pin along the entire length and along the folds, topstitch at 0.2 cm (1/16”). Press.
BELT
1. Interface the waist cut in the lower belt (8) with fusible bias tape.
2. Overlock or zigzag the lower waistband edge (8).
3. Place the upper (7) and lower waistband (8) right sides together, stitch. The stitching line should be at 0.7 cm (1/4”) from the edge.
4. Topstitch along the lower waistband at 0.2 cm (1/16”) from the stitching seam and press.
5. Cut the length of the belt loops according to the pattern and stitch them onto the upper part of the belt along the notches
6. Pin the belt along the notches to the waist line and stitch. Press the seam allowance up to the side of the belt.
7. Sew the fly and fly catch with a belt (optional).
8. Pin the belt along its entire length and topstitch around the circle.The stitching line should be at 0.2 cm (1/16”).
9. Fix the belt loops along the upper edge of the belt by 0.2 cm (1/16”). Press.
10. Overstitch the buttonholes and sew the buttons.
11. Give the garment a final press.