
Sewing a dress: a complete guide for beginners & experts

PATTERN DESCRIPTION
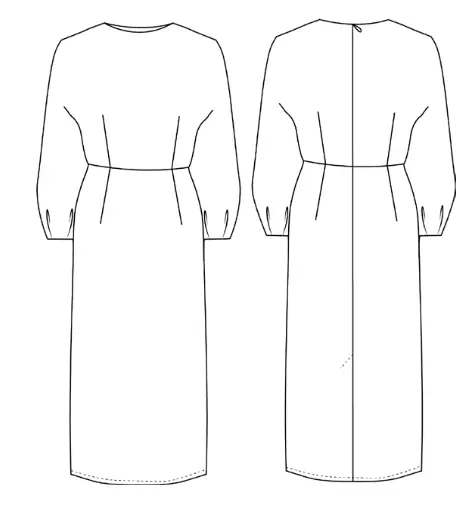
Dress with one-piece sleeves, seam at the waist, fitted cut, mid-calf length. There are pleats along the bottom of the sleeves, and an invisible zipper in the middle back seam.
SUGGESTED MATERIALS
We recommend using costume fabrics or fabrics for making dresses.
ALSO NEEDED
• Interfacing — 0,60 m (⅝ yd);
• Fusible tape — 1,70 m (1 ⅞ yd);
• Invisible zipper — 0,55 m (⅝ yd).
FABRIC REQUIREMENT (CM/IN)
for fabric width 1.50 m (1 ⅝ yd)
|
International Size \ European size |
XXS-XS / 34-36 |
S-M / 38-40 |
L-XL / 42-44 |
2XL-3XL / 46-48 |
|---|---|---|---|---|
| Main fabric, m | 1,65 | 1,75 | 1,85 | 1,85 |
| Main fabric, yd | 1 ¾ | 1 ⅞ | 2 | 2 |
SEAM ALLOWANCES
Pattern pieces already include 1 cm (3/8”) seam allowances.
SPECIFICATIONS
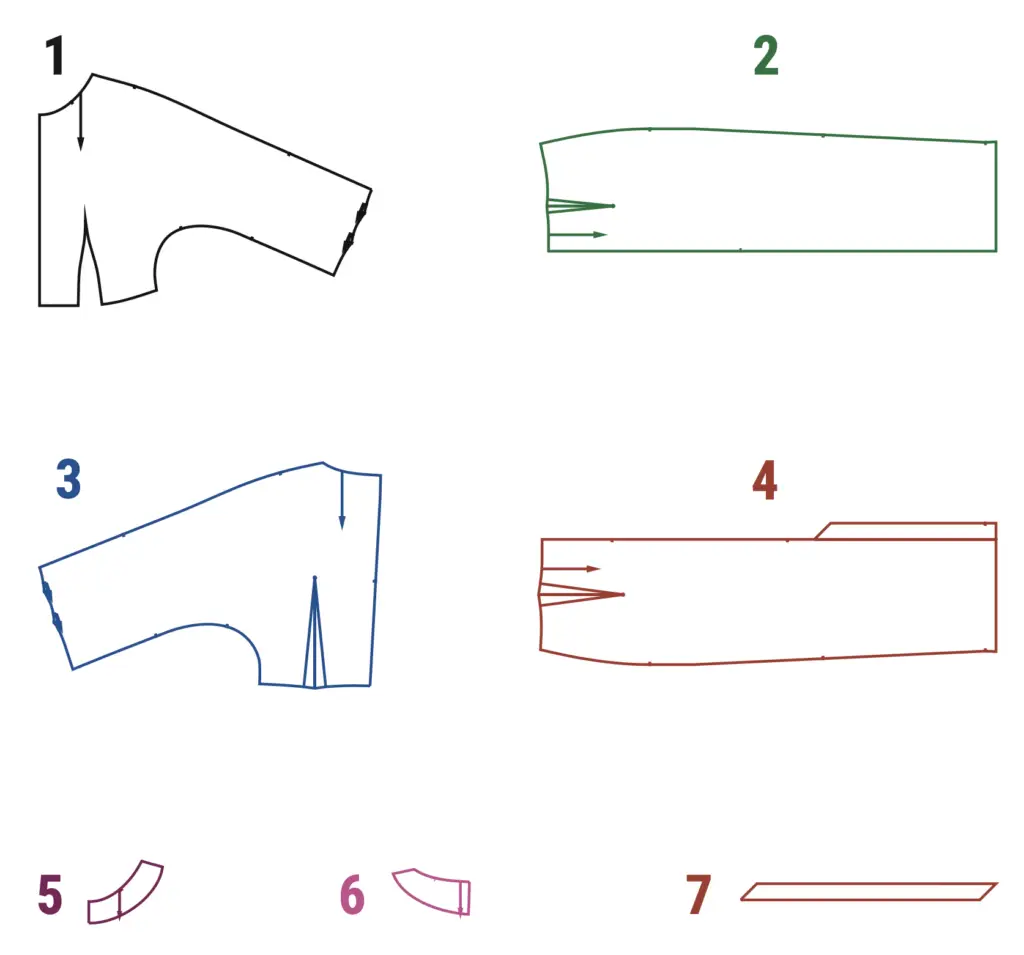
(№ – Name – Pieces’ quantity)
Main fabric:
1 – Folded front bodice – 1
2 – Folded bottom bodice – 1
3 – Back bodice – 2
4 – Back bottom – 2
5 – Folded front facing – 1 + Interfacing
6 – Back facing – 2 + Interfacing
7 – Sleeve edgin – 2
TOTAL EASE ALLOWANCES
(in cm and in)
• Waistline ease — 6 cm (2 ⅜”);
• Hipline ease — 4 cm (1 ⅝”).
PATTERN PIECES
INTERFACE THE PIECES
Front facing (5), back facing (6).
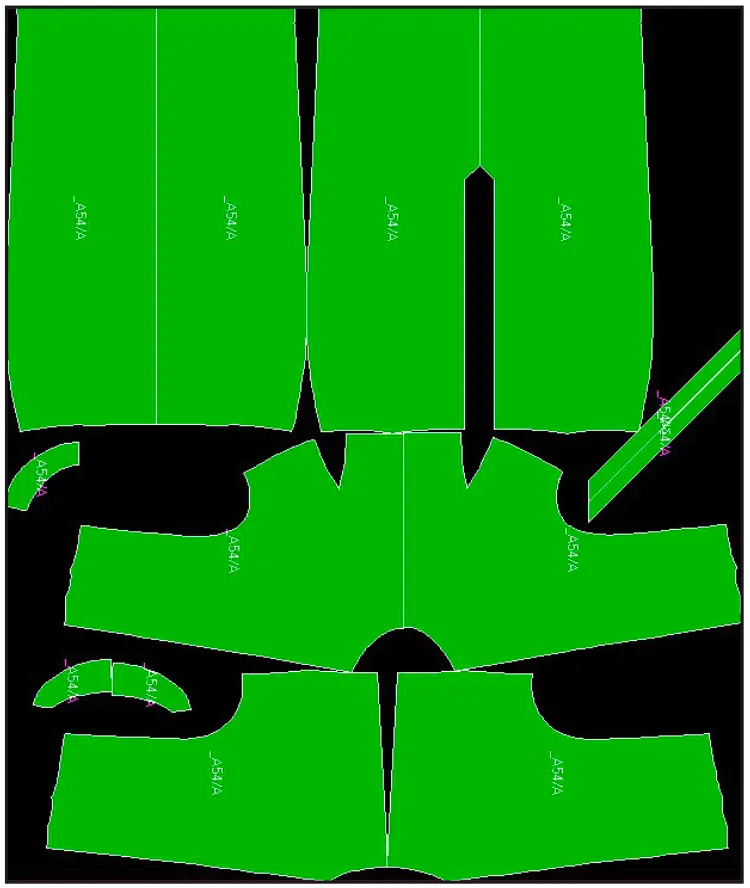
LAYOUT OF PARTS ON FABRIC
Width of fabric — 1.50 m (1 ⅝ yd)
Size — 34 (XXS)

Size — 48 (XXXL)
SEWING INSTRUCTIONS
THE DRESS
1. Pin and stitch the darts on the front bodice part (1). Overlock or zigzag and press to the center of the part. Iron in the chest area.
2. Sew the darts on the back bodice pieces (3). Press to the center.
3. Sew the darts on the front bottom (2) and back bottom (4). Press to the center.
4. Place the front bodice (1) and the front bottom (2) right sides together and stitch along the waistline. Overlock or zigzag the seam allowance and press down.
5. Do the same with the back bodice (3) and the back bottom (4) pieces.
6. Place pleats along the bottom of the sleeve, pointing toward the bottom allowance of the sleeve.
ZIPPER
1. Interface with the fusible tape the middle back seam allowance and the vent allowance under the zipper.
2. Overlock or zigzag the middle back seam together with the vent.
3. Press the vent.
4. Sew the middle seam of the back moving to the vent. Press the seam allowances and place a top and securing stitch along the vent.
5. Steam the zipper.
6. Unzip and place one part of the zipper against the hemmed edge of the back, pin it in place and stitch using a zipper foot.
7. Zip it, copy the notches and seams to the second part of the zipper. Sew the second part of the zipper, matching all the marks. Press.
NECKLINE FACING
1. Interface the top seam allowance of the front (5) and back (6) with fusible tape.
2. Place front (5) and back (6) facings right sides together, sew shoulder seams. Press seam allowances. Overlock or zigzag the bottom edge of the facing.
3. Sew the facing to middle back seam. Unzip the zipper and place the facing to the zipper with the right side, stitch close to the zipper links. Zip the zipper and press the facing, secure the facing to the zipper at the bottom.
4. Place the front on the back, pin together the shoulder sections and stitch together with the sleeve. Overlock or zigzag the seam allowance and press towards the back.
5. Turn the facing onto the back, right sides together, pin along the neckline, aligning the notches and seams. Trim in the shoulder seams area and on the curves.
6. Toptitch along the facing by 0,2 cm (1/8”). Press the facing on the wrong side, rolling the seam toward the dress by 0,1 cm (1/8”).
7. Secure the facing to the shoulder seams with a small tack.
DRESS AND SLEEVE HEM
1. Edge the bottom of the sleeve with the edging piece (7). Press the edging and press it to the wrong side.
2. Pin together the side sections, aligning the notches, and stitch together with the sleeve. Overlock or zigzag and press to the back side.
3. Secure the edging along the sleeve seams.
4. Press the hem of the bottom of the dress to the wrong side.
5. Sew the vent at the bottom along the hem, turn it inside out and secure it.
6. Topstitch along the bottom allowance of the vent by 0,5 cm (just under 1/4”).
7. Topstitch along the bottom.
8. Iron the finished dress.