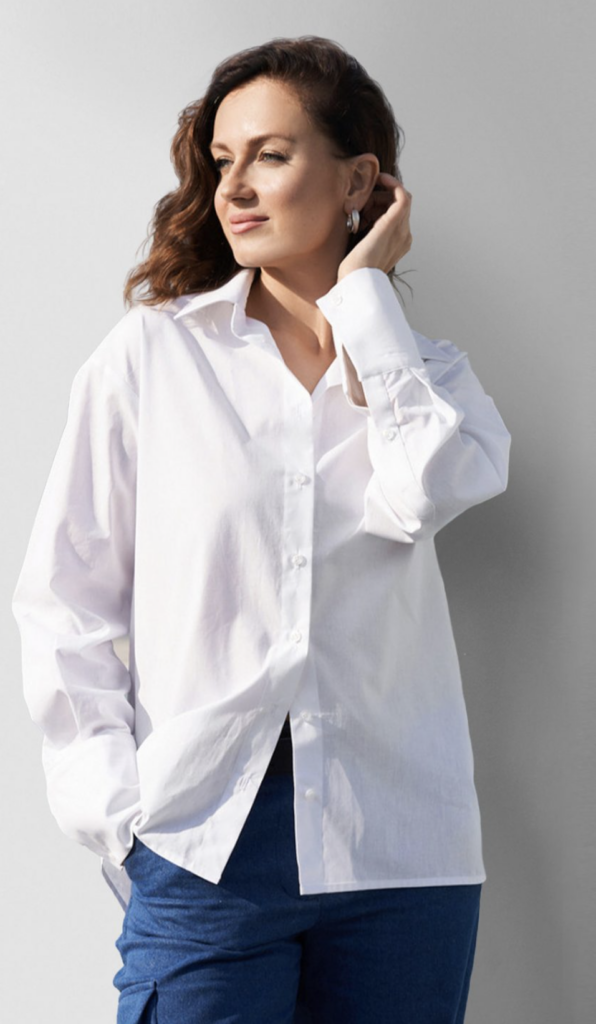
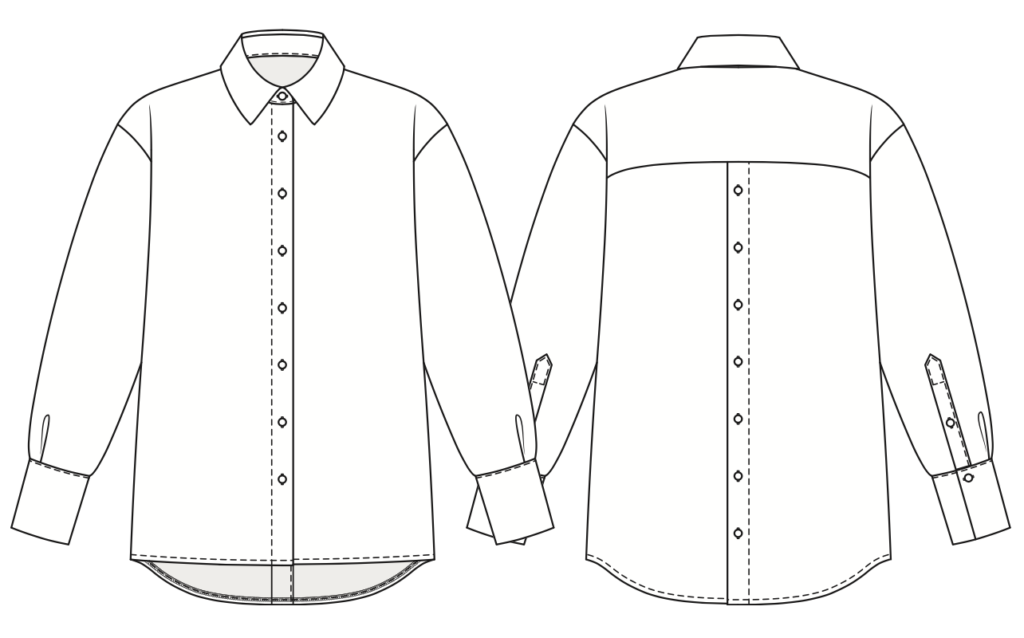
A mid-thigh length shirt with a turn-down shirt collar with a separate collar stand. It features a center front placket with buttonholes. Long sleeves are finished with buttoned cuffs. The back features back yoke and decorative placket.
Choose cotton shirting fabrics, medium weight and soft.
• Interfacing 30 cm (11,8”);
• 18 buttons.
|
International Size \ European size |
XXS-XS / 34-36 |
S-M / 38-40 |
L-XL / 42-44 |
2XL-3XL / 46-48 |
|---|---|---|---|---|
| Main fabric, m | 1,4 | 1,55 | 1,65 | 1,75 |
| Main fabric, in | 55,1 | 61 | 65 | 68,9 |
Pattern pieces already include 1 cm (0,39”) seam allowances for all edges.
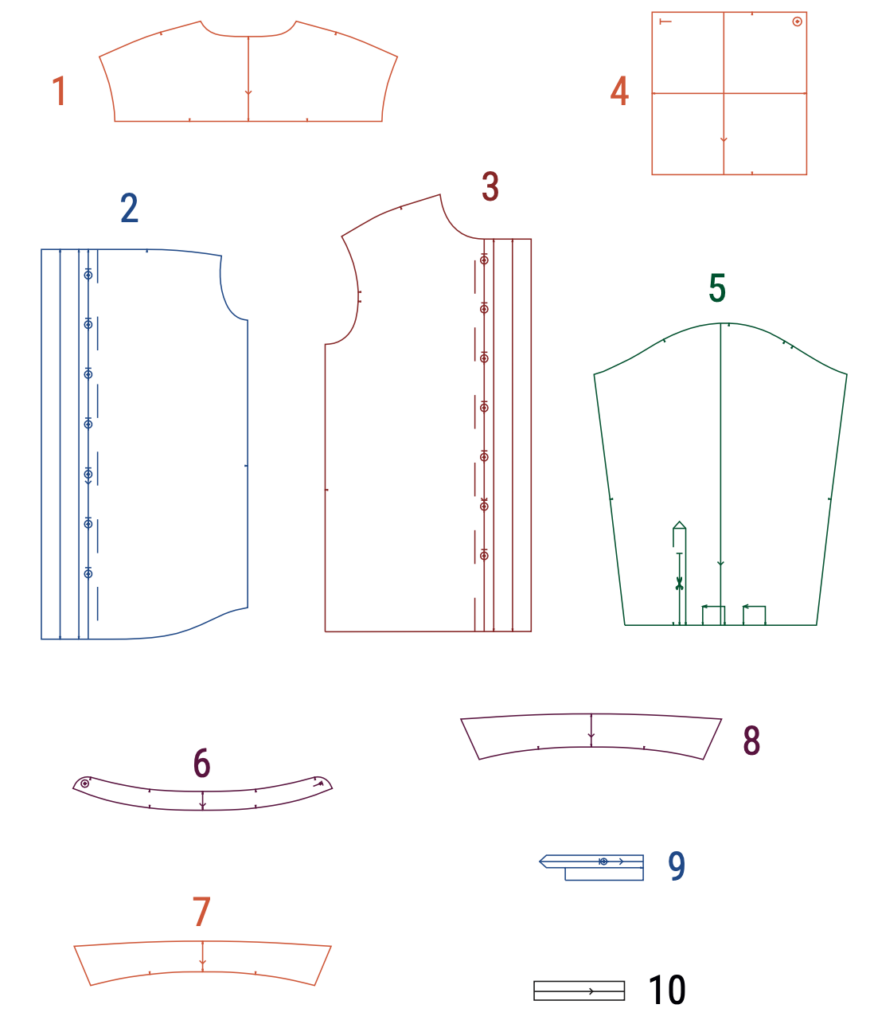
(№ – Name – Pieces’ quantity)
Main fabric:
1 – Back yoke – 2
2 – Back – 2
3 – Front – 2
4 – Cuff – 2 + Interfacing
5 – Sleeve – 2
6 – Collar stand – 2 + Interfacing
7 – Under collar – 1
8 – Top collar – 1 + Interfacing
9 – Sleeve placket – 2 + Interfacing
10 – Sleeve binding – 2
Stencils
11 – Buttons stencil – 1
Width of fabric — 1.50 m (1 ⅝ yd)
Size — 34 (XXS)
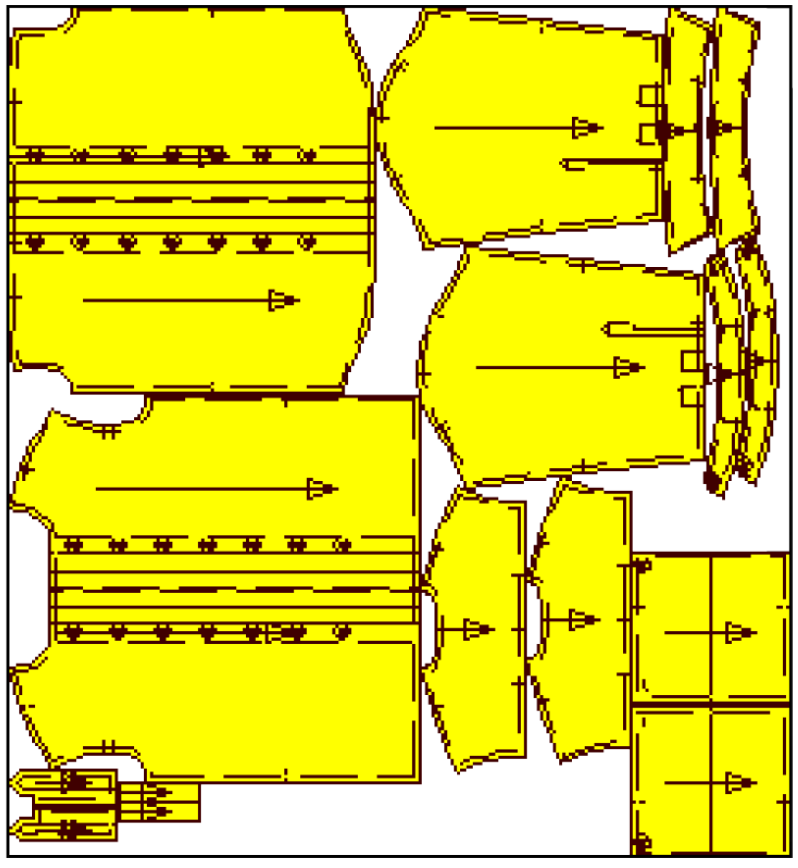
Size — 48 (XXXL)
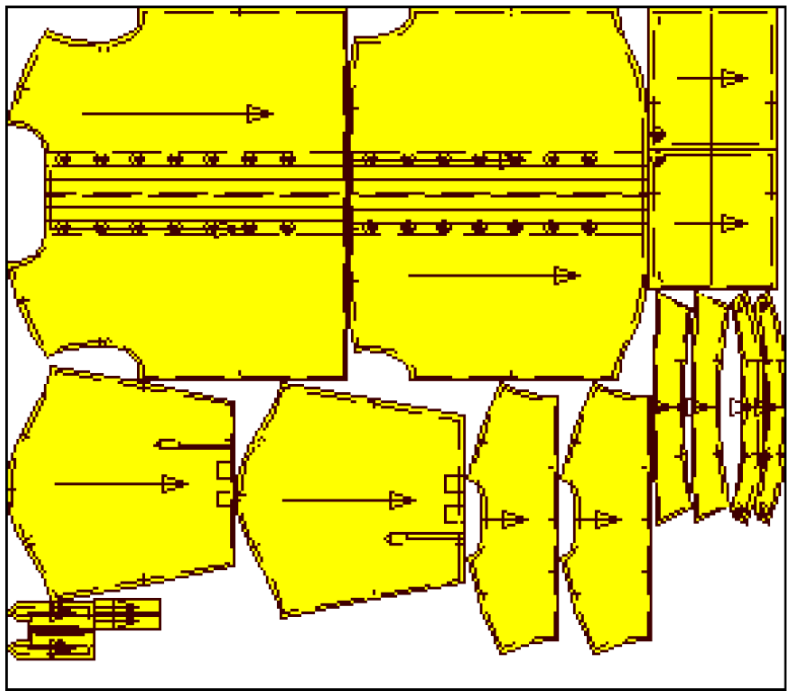
Cuff (4), top collar (8), collar stands (6), sleeve plackets (9).
BACK
1. Double fold and press seamless plackets (2). Edgestitch into place.
2. Make buttonholes on the right part (2). Sew on buttons to the left side. Put the right part over the left one. Stitch on the sewing machine.
BACK YOKE
1. Put the back piece between two yokes (2) stacked right sides touching (shoulder seams down).
2. One yoke should be right sides together with the back, and another one is placed right side to the back’s wrong side.
3. Pin 3 layers and stitch on the sewing machine.
4. Take both yokes up. The seam allowance should be inside.
5. Press the seam. You also can topstitch 0,1 cm (0,04”) away from the seam.
6. Use the same technique to put together shoulder seams. The front shoulder edge should be positioned between yokes.
7. Turn the garment the right way out through the neckline. Press.
PLACKET
1. Double fold and press the front plackets (3). Edgestitch into place.
COLLAR WITH A COLLAR STAND
1. Place top collar (8) and under collar (7) right sides together. Stitch (seam allowance is 0,7 cm (0,28”)).
2. Trim the seam allowance in the corners. Turn the right side out. Edgestitch if you want to.
3. Pin the raw edges and make a binding stitching.
4. Stack collar stand pieces (6) with the right sides facing each other. Put the collar between them.
5. Pin and sew the pieces together. Trim the seam allowance at the curves.
6. Turn the right way out and press.
7. Pin the outer collar stand to the neckline right sides together. Stitch, press the seam allowance towards the stand.
8. Fold towards the wrong side the seam allowance of the inner stand. Baste the inner stand to the seam.
9. Stitch along the contour, close to the seams.
SLEEVE PLACKETS
1. Sleeve (5) plackets should be done symmetrically on both sleeves.
2. Trim plackets (9) seam allowances at the corners, then fold and press them towards the wrong side.
3. Fold along the fold line wrong side inside and press.
4. Unfold the planket. Cut placket box centre line slashing into corners and creating V shape seam (the pattern has lines you need).
5. Place the placket on the corresponding placket box side so it hugs the seam. Pin and stitch the planket’s outer half to the sleeve right sides together.
6. Fold up the small triangle at the end of the cut on the right side.
7. Place the sleeve bindid (10) the way it hugs the placket box opposite side. Topstitch it. Place the binding’s end on the sleeve right side.
8. Place the planket piece the way it covers the binding and V shape seams.
9. Pin and baste properly.
10. Topstitch along the seam.
11. Topstitch the planket’s upper end according to the lines.
12. Make the pleats at the bottom of the sleeve matching the notches. Baste.
13. Pin and sew the sleeve cap to the armhole. Finish the seam and press it towards the shirt. You can also make the lapped seam here.
14. Pin and stitch the underarm and side seams. Finish on the overlocker and press towards the front. You can use lapped seam or French seam techniques instead.
SLEEVE CUFFS
1. Fold cuffs (4) in half the right side inside.
2. Stitch the short ends together finishing the seam 1 cm (0,39”) before the raw edges.
3. Turn the right side out and press.
4. Pin one of the cuff’s raw edges to the bottom of the sleeve. Stitch.
5. Press the seam allowance towards the cuff.
6. Fold towards the wrong side the seam allowance of cuff’s another edge. Baste to the seam.
7. Stitch along the contour, close to the seams.
8. Fold the hem allowance twice by 0,5 cm (0,2”). Edgestitch.
9. Mark and make buttonholes in the right front. Sew the buttons on the left front.
10. Give the garment a final press.